Holiday parties are the perfect opportunity to experiment with the most inspiring celebrity hairstyles you spend the rest of the year pining (and pinning“> away for. Allure rounded up a month’s worth of stunning options, complete with styling tips and product recommendations straight from some of the pros who created them.
There are braids, waves and updos galore. And if you don’t have the same hair texture as the woman don’t fret, you can still gather inspiration from these styles. A deep side part with a sparkly pin works on any curl pattern, and we think braids always look (and hold”> their best with textured hair.
Holiday Hairstyles
 Deep Side Part
Gisele’s hair is consistently copy-worthy, and in most cases we can thank her stylist Harry Josh (along with her genetics, of course”>. This look? “It has to read rough and sexy. It can’t look polished or clean or too overdone.”
- First, he created a deep side part and combed John Frieda Frizz-Ease Curl Reviver Styling Mousse throughout her hair, blow-drying it with a diffuser for lots of volume.
- Once it was dry, he randomly wrapped sections around a one-inch curling iron, leaving the ends out.
- Then Josh had Gisele flip her head upside down while he sprayed the whole thing with Serge Normant Meta Revive Dry Shampoo. “That product totally changes the texture. It becomes kind of rough, pliable, and matte,” he says.
- He tousled her hair to make it “humongous and starchy,” then scraped it back on one side, pulling it against her head and securing it at the back with bobby pins.
 Side Part with Sparkle
Creating glossy, glamorous Veronica Lake-style waves is a lot easier than you might think.
- First, use a one-and-a-quarter-inch curling iron (like the Hot Tools Professional Curling Iron”> to curl small sections all the way around your head. “The key is to hold the curling iron horizontally, which gives you a fatter wave,” says Riawna Capri, a celebrity hairstylist and co-owner of the Nine Zero One salon in Los Angeles.
- After releasing each curl from the iron, clip it against your head to let it cool and set in that position for five to ten minutes.
- Then brush out the curls with a boar-bristle brush, like the Mason Pearson. “This step gives you that nice, smooth S shape,” she says.
- Set it all with a strong-hold hair spray (Capri likes Unite Session-Max Spray“>.
- Pull hair back on one side and secure it with bobby pins before adding the barrette. “Sometimes a barrette doesn’t have enough grip, so it needs that extra hold,” she says.

Spiky Pixie
It’s not your imagination—Hollywood is becoming the land of the pixies. One of the best examples of how to pull off a supershort cut is this textured style on Hudson. “The best part about having short hair is that you can play with it and make it a little funky,” says Cesar Ramirez, who did the dramatic chop and styled Hudson’s hair here. “You just have to sell it and be confident.”
- To get the style, he applied Redken Rough Paste 12 for hold and a semimatte finish.
- “I ran my fingers through her hair and made it a little bit messy,” he says.
- “Then I took a flatiron and bent pieces in different directions to add texture.”
 Embellished Headband
This, ladies and gentlemen, is the right way to grow out a pixie. Equal parts edgy and luxurious, the Debbie Harry-inspired look Williams wore at the Met Gala is a perfect party option for anyone with short hair.
- To get it, hairstylist Chris McMillan teased Williams’s hair before spraying it in place with Living Proof Hold Flexible Hairspray. “I used my fingers to give it a lived-in, DIY look,” he says.
- The final touch? A diamond-encrusted tiara by Fred Leighton. (Don’t worry—any glittery, embellished headband you love will do.”> “If you don’t have time to do anything else, adding a sparkly hair accessory or headband can give you glamour in a pinch,” adds Josh.
 Half Up
Timeless and (almost”> as effortless as they look, Washington’s soft, romantic waves are polished but unfussy.
- First, prep hair with a thermal protector like Alterna Bamboo Smooth Anti-Breakage Thermal Protectant Spray. “Blow-dry your hair smooth and then create loose, sporadic waves throughout. Nothing needs to be perfect,” says Fugate.
- Use a large curling iron, like the Hot Tools Professional 1 1/2″ Salon Curling Iron. “The curling iron will add shine and seal the cuticle, so it’s smooth,” he says.
- Spray hair with a firm-hold hair spray, like L’Oréal Paris Elnett Satin Hairspray, and take a section from above each temple, pulling them together and joining them in the back.
- “Then do the old-school wrap: Gather those pieces with an elastic and flip it inside out, folding the ponytail over and pulling it through,” says Fugate. “That adds height and hides the elastic, so it’s really chic.”
 Segmented Ponytail
“It’s like what we used to do in the ’90s, but it’s sleeker,” Urban says of Mara’s structured ponytail.
- Blow-dry hair straight and apply a generous amount of smoothing cream or gel, like Bumble and Bumble Gel, for a slick, supershiny finish.
- “Create a part straight back from your ears, making a section for a half-back ponytail. Make sure it’s a clean, straight line.
- Pull all of your hair from your ears up into [the] tail, brushing it into place so it’s supersmooth,” she says.
- Secure that with a black elastic, leaving the rest of your hair down.
- Then pull all of your hair (including the half ponytail you created”> into a low ponytail at the nape of your neck, securing it with another black elastic.
- “Depending on how long your hair is, continue to add black elastics every two or three inches, but don’t go too close to the bottom of the ponytail,” says Urban.
- To lock everything in place and prevent fuzz from cropping up, Urban recommends spraying the whole look with a strong-hold hair spray (she likes Sebastian Shaper Fierce Ultra-Firm Finishing Hairspray”>.

Retro High Ponytail
This is your basic high ponytail, but all dressed up.
- Rough-dry your hair (don’t use a brush!”> and spray it with a texturizer (Fugate likes Shu Uemura Art of Hair Liquid Fabric Mineral Texture Spray“>.
- Then flip your head over and pull your hair into a ponytail at the highest point of your crown, securing it with an elastic.
- Pull a section of hair from the back of the ponytail and wrap it forward, toward your face, around the base of the ponytail.
- Secure it by crisscrossing bobby pins, pushing them in from the back of the ponytail toward the front. “This supports the ponytail so it sits up and has height,” says Fugate.
- To add bounce and volume, back-comb it by grabbing the end of the ponytail and running your fingers up through it. Finish with a spritz of hair spray. “You want to give this ponytail a cotton-candy texture that’s not too airy,” says Fugate. “It shouldn’t be perfect and sleek.”
 Chain Link Braid Headband
We thought we had seen every kind of braid out there—until we stumbled upon this unbelievably cool knotted version. “This is great for someone who has ombré color or highlights, since it really shows them off,” says Urban. It’s a little complicated, but still doable (we promise”>.
- Make a side part, then create a two-inch section of hair where your part and hairline meet, on the side with more hair.
- “Divide that section into two pieces and tie them together like you would a knot, but really loosely, leaving a big gap,” Urban says.
- Then pick up two more pieces from the head and make a second knot, incorporating those pieces into the two main strands as you would with a French braid.
- “Continue that process all the way down, adding a little more hair with each new knot you make. You probably won’t even need to pin it because the knots will keep it anchored to the head,” she says.
- Twist the rest of your hair into a low, messy bun and secure both the chain-link braid and the bun with bobby pins.
- “Finish the look by pulling out some wispy pieces at the front, which makes it look more romantic,” Urban explains.
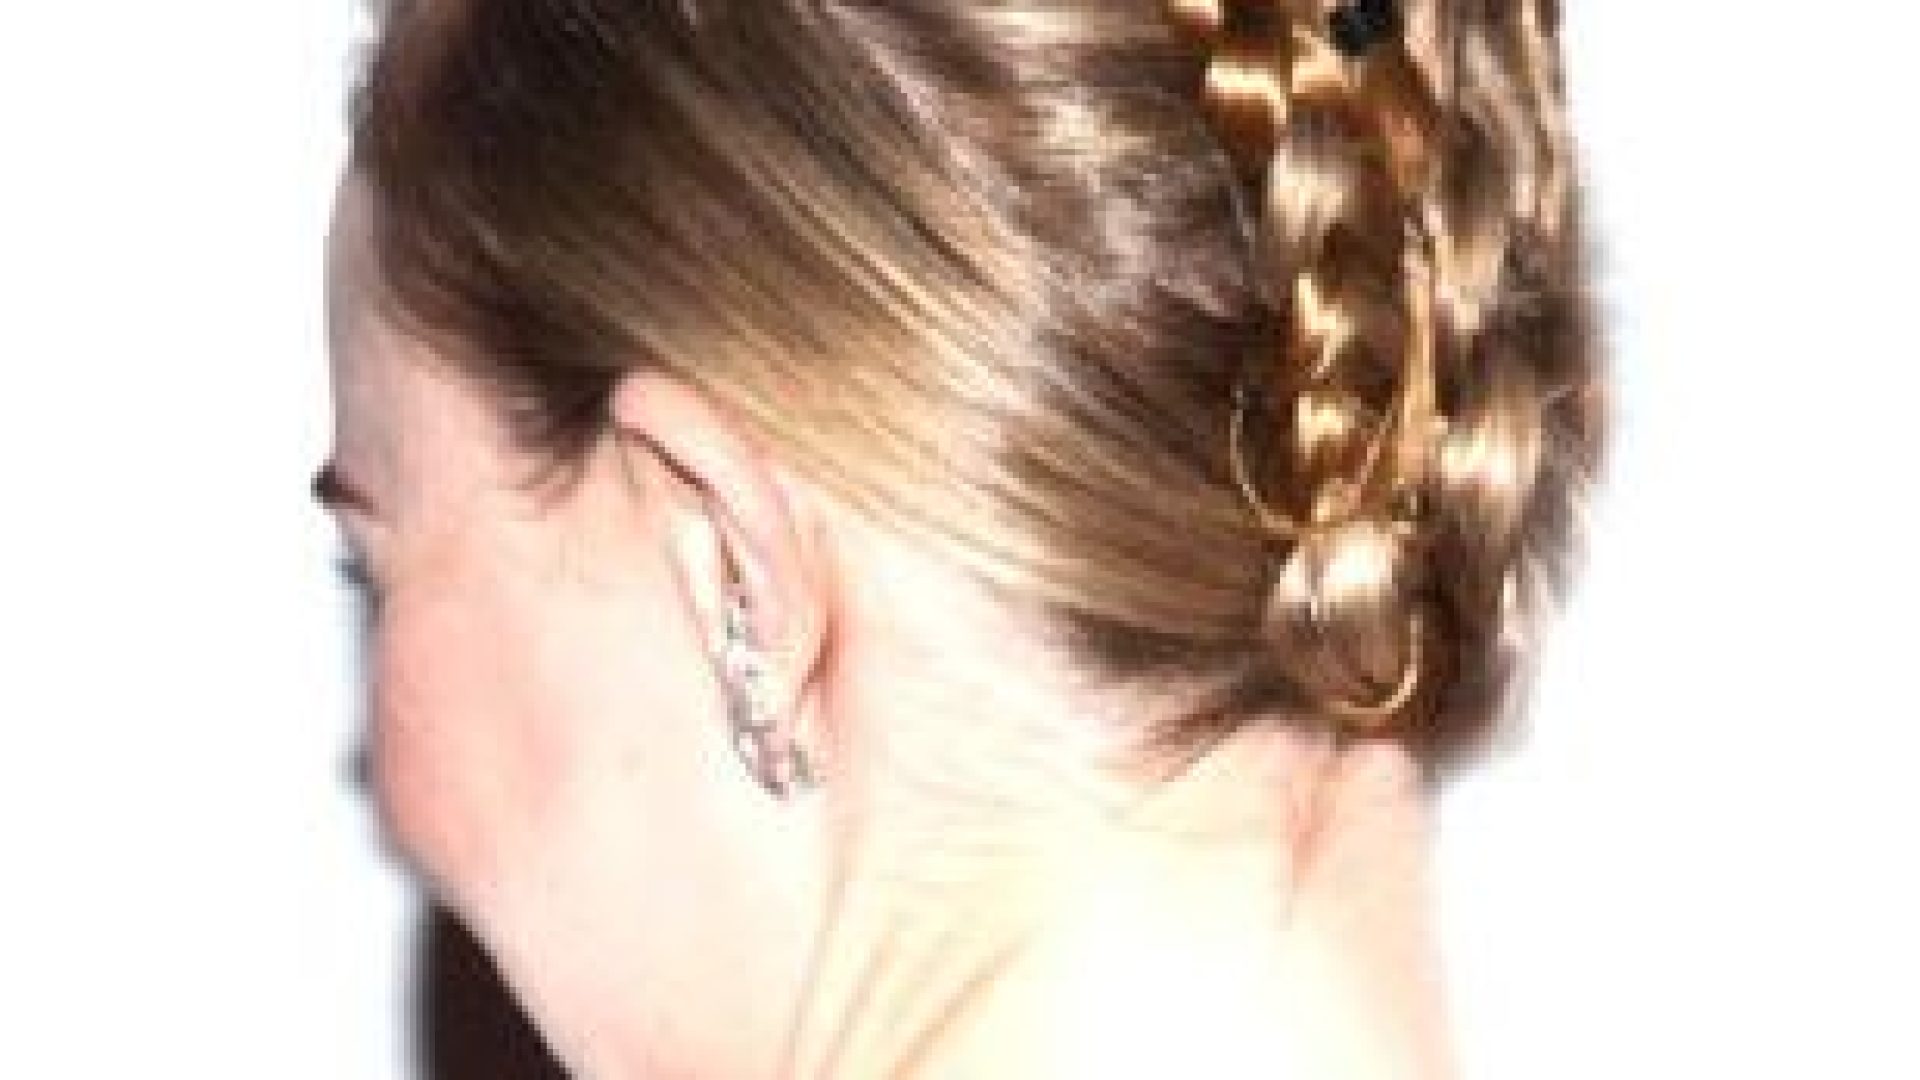
 Multi-Braid Bun
Braids don’t have to be complicated (that last style notwithstanding”>. If you can braid and make a bun, you can copy Lawrence’s pre-pixie style here.
- “Start by creating four or five braids at the front of the head from temple to temple, leaving the rest of your hair loose” says Isabel Guillen, a braid expert and stylist at the John Barrett salon. She recommends applying a styling balm first, like John Barrett Be Hold Styling Balm, for added control.
- Then pull the braids and the rest of your loose hair back, making a low ponytail and securing it with an elastic before pinning the hanging pieces up into a bun. “If you don’t have bangs like Jennifer, pull out face-framing pieces to soften the look,” she says.
- Finish by misting the style with a light hair spray (Guillen likes Shu Uemura Art of Hair Sheer Lacquer Micro-Fine Finishing Spray“>.
 High Fishtail Braid
We love this ponytail-fishtail hybrid for its cool-girl vibe and the fact that it’s easy to pull off once you know how to fishtail (watch our video for step-by-step instructions—it’s way easier than you think”>.
- To get this look, “pull your hair into a really sleek high ponytail,” says Fugate. “You want the braid to be the focus—this isn’t one of those times when you should blow-dry your hair with volume.”
- Secure the ponytail with an elastic, then wrap a one-inch section of hair from the ponytail around it so the elastic is hidden.
- Fugate recommends spraying the ponytail with a dry shampoo, like Dove Refresh+Care Invigorating Dry Shampoo, which will add texture and grip as you braid.
- Break the ponytail up into two sections and create a tight fishtail using tiny pieces of hair. “Spend a good 10 to 15 minutes on the braid,” says Fugate.
- After securing it with a clear elastic at the bottom, run a serum (like O&M Frizzy Logic Shine Serum”> over the whole braid for shine and polish.

Braid Hawk
How do you make a braided updo even cooler? Make it a faux-hawk, like the one Bosworth wore at the New York premiere of Big Sur. “There’s an innate romance to it, and something a little dangerous,” she told Allure’s Jeffrey Slonim about the look.
- Her hairstylist, Renato Campora, created it by smoothingSerge Normant Meta Form Sculpting Pomade through her hair to give it slickness and hold.
- Then he made three sections from the front of the head to the nape of the neck, each about three inches wide.
- He brushed the sections on the sides down, slicking them close to the head, and pulled them into a ponytail, securing it with a small elastic.
- Within the middle section, he made three smaller sections and French-braided each of those separately toward the nape of the neck, keeping the braids close to the head but leaving a bit of height and softness near her forehead.
- “When I reached her neck, I wrapped the braids against her head and secured them with bobby pins,” says Campora. “The braid was almost an accessory. It has that [Mohawk] look without being too punk.”
 Loose Side Braid
Pretty and feminine, Olsen’s braid is also ridiculously easy to create.
- “Start with a little bit of Bumble and Bumble Grooming Creme for shine and roughly blow-dry the hair with your fingers, not a brush, to give it texture,” says Urban.
- Make a deep side part and begin to braid the hair, starting just below ear level, pulling it in the opposite direction of the part.
- “Keep the braid loose and wrap it around to the front, over your shoulder, as you go,” she says.
- The front pieces will fall out naturally if you have layers, but you can also pull a few strands free and loosen the braid by breaking it apart gently with your fingers for a slightly disheveled (in the best way”> effect.
 Undone Fishtail Braid
“The key here is texture,” says Fugate. He recommends letting your hair air-dry if you have a naturally curly or wavy texture. If you don’t, “load your hair with surf spray or a light gel” and blow-dry it with a diffuser, he says. “You really want to bring out as much of the messy curl as possible. This is not something you’d want to pull your curling iron out on. You want the curls to be irregular.”
- Once your hair is “all big and Medusa-y” (Fugate’s words”>, pull the top section back, as you would to create a half-up ponytail.
- Gather the hair in the back and start a French-fishtail at the center of the head, pulling in more hair as you work your way down. “Let pieces fall away,” says Fugate. “Let it be messy. Just rope the pieces in, twisting the hair.”
- Continue the fishtail all the way to the ends, pulling the braid to one side as you reach your shoulders.
- Still not messy enough? “You can dishevel it a little bit at the end,” he says. “Pull it apart and rough it up with a pomade like Bumble and Bumble Sumotech.Make sure it has pieces sticking out.”
 Halo Braid
Feeling especially adventurous? Try a halo braid that wraps all the way around your head—it’s involved but oh so pretty. Here’s how to do it: “You want to prep your hair for lots of volume,” says Fugate.
- “Rough-dry it with your fingers so it has a tousled feel.”
- Grab a big section of hair behind one ear, where you would place a low side ponytail. “Start French-braiding it against your head all the way up. You can hang your head upside down so gravity helps,” he says.
- Continue the braid, wrapping it around your head and pulling in more hair as you go, making sure to leave about two inches of space between the front of your hairline and the braid. Stop braiding when you reach the opposite ear and pin it in place.
- “You want to add a healthy-looking shine at the end,” says Fugate, who recommends spraying the whole look with Sally Hershberger Star Shine. And don’t worry about making it too perfect: “If there are any pieces that pop out, it actually makes it look cool and fresh.”

Double Braided Updo
This style takes some skill (and practice, and maybe a three-way mirror”> to pull off, but it’s one of our absolute favorites. “I wanted to have a lot of fun and show off Minka’s face,” says Atkin, who created the look.
- To get it, she prepped the hair with a beach texturizing spray and curled random sections with a one-and-half-inch curling iron. She also sprayed Oribe Dry Texturizing Spray all over to add texture.
- “I parted her hair in the middle and did two inside-out French braids on either side, leaving hair at the back of the head loose,” says Atkin.
- Once she reached the back of the head, she made two more braids with the remaining loose hair, starting at the nape of the neck.
- Then she pinned everything up into a messy knot. “I wanted a deconstructed look, so I took a Sonia Kashuk Small Hair Brush and teased the braids to give that piecey feel,” she says.
- The final step was to add some bling—an actual necklace that she broke into pieces and pinned above the braids. “I like the sharp edges of the jewelry. It went along with the deconstructed theme.”
 Embellished Rolled Updo
“It’s like a French twist that goes all the way around the head,” Urban says of Saldana’s rolled updo. Paired with a sparkly accessory, it’s perfectly holiday-party-appropriate and easy to achieve.
- “Make a deep side part and smooth all the hair over to one side,” says Urban.
- “Then starting at the hairline near your part, twist your way down, incorporating all of your hair and coiling it along your hairline down to the back.”
- Secure it with bobby pins as you go to hold everything in place.
- “Make sure everything at the crown stays really flat,” she says. “The key is pulling hair down, then twisting it up from the bottom.”
 Knotted Updo
“While the classic updo will always be a hair staple, I prefer trying a fresh interpretation,” says Guillen. “Carey’s is an excellent example.”
- To follow her lead, tease hair at the front and mist on a light hair spray, like Shu Uemura Art of Hair Sheer Lacquer Micro-Fine Finishing Spray, for volume and hold.
- Create three separate tiers, parting hair across the back of the head and pulling each section into a distinct ponytail.
- Secure each of them with a clear elastic.
- Grab the bottom ponytail and twist it tightly. “Begin coiling it toward the head, releasing tension slightly as you go to get that ropy texture,” says Guillen.
- Once it’s flat to the head, secure it with bobby pins.
- Repeat that same step on each of the two other ponytails, piling the coiled buns and creating a twisted pattern on the back of your head.
- Finish the look with a holding hair spray like John Barrett Be in Control.

Braids All Over
OK, we’re not going to lie to you: This one isn’t going to be easy. But look at it! Stunning. The chances of recreating it at home? “I’d have a friend help with this one,” says Urban (a nice way to put it”>. Hand her these instructions:
- Spray hair with Kérastase Resistance Volumactive Volume Expansion Sprayand blow-dry it smooth.
- Make a deep side part and start a French braid at the temple. “It’s essentially a French braid cornrow,” says Urban.
- “Braid from the front of the temple over the ear and down to the nape of the neck.”
- On the other side of the head, make another French braid, starting at the crown and going off to the side, including all of the hair from above the ear.
- “Pin those two braids to the back of the head where they meet,” she explains.
- Wrap the ends of the braids up in a coiled way—not in a bun, but in a mazelike pattern, pinning them in place. “If you have lots of hair, you can create a third braid in the middle and pin that up, too,” says Urban. Best of luck!