Search Results: Ashley H


For a variety of reasons, winter is one of the harshest times of year for our hair. The air is much drier outside and warmer inside due to the outside temperatures. But even though winter may be a hard season to deal with hair-wise, it doesn’t have to be. While our ends unfortunately take the biggest hit during these dry months, there are several ways to help them out! Here are some of my favorite tips to help get you over those winter hair woes.
Start Off Fresh
Now I’m not suggesting that you cut everything off, but I am suggesting that you start off with fresh ends! If you haven’t gotten a trim in more than three months, it’s time to do so. Trimming your ends alleviates some of the dryness of your hair by getting rid of ends that continuously suck the moisture out of your healthy, moisturized hair. When you hold on to dry ends, your products may react differently and you find that your hair loses moisture much faster. Getting rid of those dead ends allows your hair to fully thrive.
Protect Your Ends
Wearing scarves during the winter months keeps us warm, but they can also wreak havoc on the ends of our hair. When our hair constantly rubs against our scarves, it can further dry out the hair and cause breakage. Thus, it’s important for us to keep our ends protected, and I have a couple of suggestions in mind:
- Tucking your ends away can be one of the ways to protect them. This is where buns and other styles come in. Just make sure you moisturize and seal your ends before tucking them away to ensure that they stay moisturized while they are under wraps.
- Leave-in conditioner is extremely important! In fact, it’s the most important step after washing your hair, which is why it’s extremely valuable during drier months. When moisturizing your hair, you should use a water-based leave-in conditioner and an oil or pudding-like product to seal in the moisture. You can always add a little more leave-in conditioner to the ends of your hair before leaving the house. The goal is to keep your ends as moisturized as possible to prevent breakage!
Deep Condition Often
Deep conditioning during the drier months is imperative for healthy, moisturized hair and length retention. Our hair is naturally dry and the winter air and inside heating doesn’t help. Therefore, it’s important for us to deep condition our hair to provide the necessary hydration to keep it looking and feeling its best. My favorite deep conditioners are the Tgin Honey Miracle Mask and Neutrogena Triple Moisture Recovery Hair Mask.
During the winter months, I like to incorporate a heat source into my regimen. I use either a hooded dryer or the QRedew Steamer. The heat opens the hair cuticle, allowing the product to penetrate the strands, providing me with a deeper condition. I prefer steam treating my hair in winter because it allows for fresh water to enter into the hair. Thus, my hair stays moisturized and softer for longer! I also notice that my hair is a lot more luscious and there is an increase in my hair’s elasticity, which is very important on the road to healthy hair.
Co-Wash More
I’m a firm believer in using shampoo, but I prefer to use a conditioning cleanser for my weekly washes during the winter months. Conditioning cleansers have cleansing agents in them that are less harsh than those in shampoos, and are a lot more beneficial to our hair when the air is cooler outside, warmer inside, and dry all around. Using a cleansing conditioner ensures that your scalp and hair are properly cleansed and your hair is still moisturized. Thus, your scalp is able to breathe and your hair continues to flourish. I like to use Mizani True Textures Cream Cleansing Conditioner during the winter months.
Winter is cold and drying, but the effects of winter don’t have to show on your hair. Protecting your ends, the oldest and driest parts of your hair, becomes increasingly important when they are susceptible to breaking easily due to friction against our clothes and moisture loss. Protect those ends and your hair will thank you later.
Many naturalistas choose to debut new hair colors during the fall since summer is winding down, and we are now focusing on hair growth. We’re more likely to experiment with protective styles, try out that new deep conditioner we’ve had our eye on, and bust out all of the fall and winter fashion. I’m all for changing things up with color, but it’s important to be realistic about the maintenance your new color will require, especially during those colder months.
There are so many factors that go into how color changes during its lifetime, and the elements play a large role in those changes. I learned my lesson when I went to Jamaica earlier this summer in June. I knew I would experience some fading, but I didn’t expect for my hair to fade back to blonde – yikes! Here are some ideas as to how the elements fade color and what can be done to prevent it.

The Sun
The sun is a key element in fading color. Much like our skin, if we do not use products with UV protection we are leaving our strands exposed to the harsh rays of the sun, which can severely damage our hair. Colored hair tends to be drier than usual and exposure to the sun for multiple hours can further dry the hair out. The solution? Use color protecting products, as well as products that have UV protection to not only prevent color fading, but to also keeps strands hydrated and soft. If possible, you should also consider using a scarf or hat for added protection. You can never be too prepared!
Wind
Everyone enjoys a good crisp fall breeze, but are we prepared for the color fading that comes with it? Much like washing your hair, high winds and drier temperatures can be especially damaging if your hair isn’t properly prepped for the day. Before heading out, you should lightly mist your hair down and apply a moisturizer to your strands and ends. The moisturizer creates a barrier between your hair and wind, preventing color from fading quickly and adding a layer of protection. You can never have enough moisture in the fall and winter months, so think of this as the perfect time to try out some new products you’ve had your eye on. You can also choose to use a heavier product during this time.
Washing Your Hair
Regular hair washing can cause color to fade, especially if you aren’t using products that are safe for color treated hair or products that help to deposit color. It’s important to know what kinds of products are safe for color treated hair, which includes sulfate free shampoos. On top of using products that are safe for color treated hair, you may want to invest in color depositing products that do just that – deposit color back into the hair. These products help restore vibrancy and increase the lifespan of your color. It may seem like a lot, but I like to wash my hair with a conditioning cleanser or sulfate free shampoo, then I go in with my color depositing shampoo and conditioner. I like to leave the shampoo in for 3-5 minutes, then I apply the color depositing conditioner to my hair in sections to really work it into my hair. After I’ve fully saturated my hair with the conditioner, I leave it on for the duration of my shower until I am ready to rinse my hair. Then, I’ll rinse with lukewarm to cold water to prevent color from escaping. I’m currently using the Joico Color Infuse Red Shampoo and Conditioner.
,0 1px 10px 0 rgba(0,0,0,0.15″>; margin: 1px; max-width: 658px; padding: 0; width: calc(100% – 2px”>;” data-instgrm-version=”7″>
,0 1px 10px 0 rgba(0,0,0,0.15″>; margin: 1px; max-width: 658px; padding: 0; width: calc(100% – 2px”>;” data-instgrm-version=”7″>
,0 1px 10px 0 rgba(0,0,0,0.15″>; margin: 1px; max-width: 658px; padding: 0; width: calc(100% – 2px”>;” data-instgrm-version=”7″>
Not only do the products you use play a part in the lifespan of your color, but the temperature of the water also plays a part in color fading. Washing hair in water that is too hot causes the cuticle to expand, allowing the color to escape from the hair. This can result in a less vibrant color and drier strands. I suggest washing hair in warm water to loosen buildup and dirt, then rinsing the hair with lukewarm to cold water to seal the cuticle to prevent any more color from escaping.

There are so many variables to consider when coloring your hair. Natural colors tend to be easier to care for, rather than blonde shades, which require a ton of moisture and artificial red shades, which easily fade. Nonetheless, I suggest consulting with your stylist to find a color that will not only fit your lifestyle, but will also allow you to live your best life.
Want more articles like this? Sign up for the Naturally Curly newsletter!
For more on how I take care of my color, follow me on ig @CurlsFoTheGirls
Hair gels have so many uses in the curly community. They provide hold to styles, allowing them to last longer, they slick down edges for sleek styles and can be used for baby hair art, and they can enhance curl definition, but is there a proper way to use gels to avoid possible damage? I think there is, and I’ve learned so many different ways of using gel to get the most out of the product.
I use gel more often during the warmer months in the fight against humidity and frizz. I feel that they help protect my hair from the humidity and allow me to get a few days out of my style before it’s time to wash it. As a gel advocate, I’m happy to share my tips on the best ways to use hair gels!
Layer Your Products
I firmly believe that layering products properly before using gel can help with preventing damage. Some gels can be drying to the hair, but layering creates a border between the product and your hair so that the gel does not dry out your strands. When I create a sleek style like a puff, I like to layer my products by misting my edges with water, applying a bit of leave-in conditioner or moisturizer, adding some oil on top, then applying my gel. My edges will lay nicely without feeling dry or crunchy. The next day, my edges are soft, I don’t experience any flaking, and I can proceed with a new style if I choose.
Use Oil
As I mentioned above, I like to layer my products before using a gel. However, you can surely style your hair without the above layering technique and just use an oil! I find that oils are great for using under or over the gel to eliminate the crunchy, dry feeling. If you prefer to use an oil after styling, apply a few drops of oil to your hands and scrunch it into your hair. It will soften the gel and boost shine, while keeping your definition and hold intact! My favorite oils to use include the TGIN Argan Replenishing Hair and Body Serum, CURLS Blueberry Bliss Hair Growth Oil, and the Ouidad Mongongo Oil Muilti-Use Curl Treatment.
Try a Moisturizing Gel
There are so many gels on the market that it can be hard to choose one that will work for you. While I am a fan of ECO Styler Gel for my super sleek styles — puffs, mohawks — I do prefer to use moisturizing gel for my wash and gos because they keep my hair soft and crunch free, while also providing great hold and definition. My favorite moisturizing gels include the CURLS Blueberry Bliss Curl Control Jelly, INSPIRE by made beautiful Hydrating Gelly, TGIN Curl Bomb Moisturizing Styling Gel, and the Bumble and bumble Bb. Curl Anti-Humidity Gel-Oil, which has amazing slip and spreadability. I get great hold and definition from these products without the crunch or dryness.
Scrunch It Into the Hair
For some curly girls, applying gel in a layering motion may be too much for their hair, causing it to look greasy and weighed down. Instead, scrunch the gel into the hair to enhance definition and fight frizz! This is one of my favorite methods for gel use because it allows me to target the ends of my hair, which are the most important in the fight against frizz. I’ve also learned that applying gel to your roots can make them flat, which we then pick and fluff to eternity creating unwanted frizz. Less product on the roots creates an easier lift!
Gels can have positive and negative effects on hair if used improperly and/or too frequently. It’s important that you find a method that works best for your hair type so you know which gel to use and how to use it to not only achieve your desired look, but prevent damaging your glorious strands.
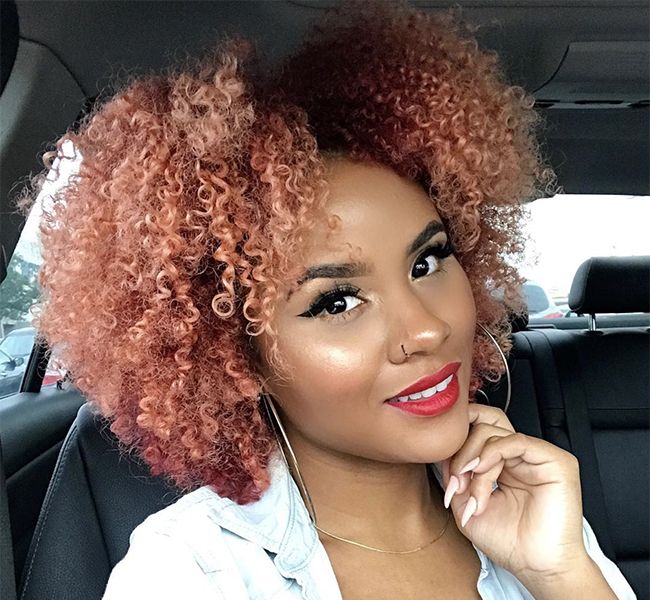
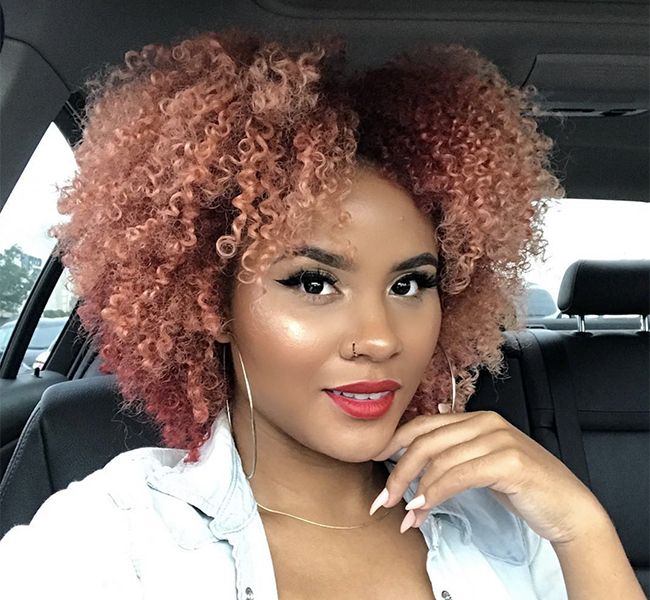
It’s no secret that I am a fan of coloring my hair. I like changing up my appearance and setting myself apart. I find it very easy to do that with a bold, bright hair color.
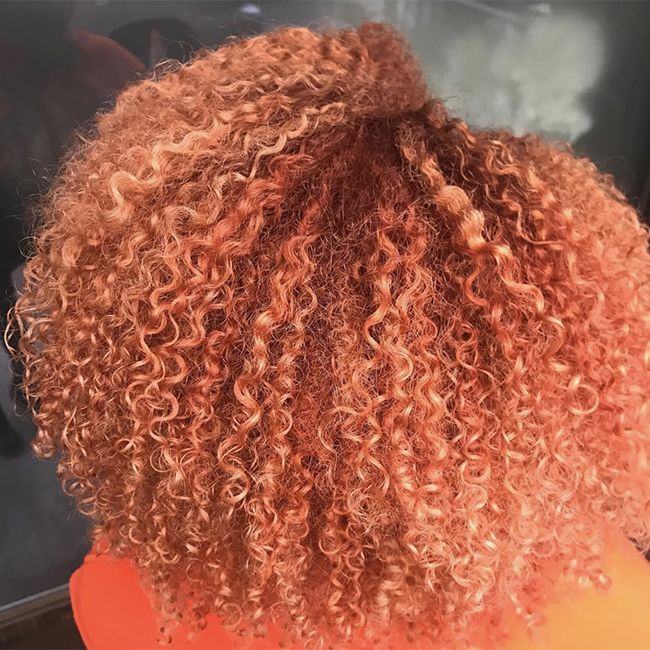
As of early June, I said bye to my overall blonde hair color and opted for a new, fiery color that will give the fire emoji a run for its money.I was scared to leave the blonde life because I had adjusted to it and loved it for a little over a year, but as much as I loved it, I had grown tired of the maintenance. It was time for a change.
Some of the reasons for change should come as no surprise, especially if you are or ever have been blonde. It’s a big monetary and time commitment, and I just didn’t have it in me anymore.
Frequent Haircuts
With my blonde color, I was keeping a haircut schedule of 2 to 2.5 months instead of the usual 3-month maintenance schedule. I felt that my ends got drier and my hair became frizzier a lot quicker, my hair shed a lot more, and it lacked definition when it was time for a haircut. In order to maintain my blonde and keep my hair healthy, I had to get rid of those ends as soon as possible. I noticed that getting my maintenance cuts around 2 to 2.5 months allowed me to keep my hair looking and feeling its best; however, it became tiring to keep up with the schedule.
Excessive Shedding and Frizz
I loved my blonde hair color, but the shedding that came with it is something I don’t miss. It also doesn’t help that the hairs are so light, which can make it seem like you’ve lost more hair than you actually did. Not to mention, the frizz was sometimes at an all time high and the only way to tame it, would have been to rewet and style the hair. Now that I’ve changed my color, I’ve noticed a significant change in the amount of shedding and frizz. Both have decreased greatly since it’s a lot easier for my hair to stay strong and hydrated.
Staying on Top of Root Touch Ups
I live for a dark root, but sometimes the dark roots got to be a bit much, especially with the ends of my hair which were very light.It became a hassle to color my roots, especially because I didn’t want to have an in-between base color, which gave me 3 or more different colors whenever I straightened my hair. I wasn’t a fan of the look. After a while, I cared less about touching up my roots and let my hair grow out to the point where I had a few inches of new growth. Just another hint at how much of a change I needed.
In-Salon Strengthening/Moisturizing Treatments
There is only so much that a drugstore strengthening/moisturizing treatment can do. Even then, some strengtheners only coat the outside of the hair rather than strengthening the hair from within. With the color of my hair, it was important that I used a strong strengthener to ensure the health of my hair, decrease shedding, and prevent unnecessary breakage. While I was able to do my own treatments at home for an additional cost (purchasing the Olaplex No. 3 treatment at $28 for 3oz”>, there were times when I needed an in-salon treatment and wasn’t able to get in with my stylist, which sometimes left me in a state of panic. It was seriously time to give it up!
Just Needing a Change
Growing tired of maintenance and lifestyle changes are clear signs that it may be time to make an adjustment to your hair. This is so you don’t become careless and neglect your hair, causing unnecessary damage.
I’m so happy with my new color and I’ve received great responses since the reveal. I’m sure there will be some maintenance with the new style, but I’ll be able to spread my treatments and haircuts out more, making it easier for my lifestyle.
Want to see more of my color? Check out my IG @curlsfothegirls!
For more stories like this, sign up for the Naturally Curly newsletter!
It’s no surprise that wash and gos are my favorite curly style. I’ve always liked them, especially when I first started transitioning to natural. To me, it was the epitome of what it meant to be natural — wearing your natural curl pattern as it grew out of your head with a bit of product on it. I loved it!
Wash and gos are also a coveted style amongst the natural hair community. For some naturalistas, it comes easy when creating the wash and wear style, as they have mastered the technique that best works for them, and then there are naturalistas that struggle to create a wearable wash and go because they have not figured out a routine that works best for their hair.
I truly believe everyone can wear a wash and go with proper technique and products, but when did the wash and go become the “It” style?
From what I can remember, wash and gos, along with twist outs and braid outs, were the main styling choices of bloggers when I initially began my journey to natural. I consider these styles to be part of the natural hair styling starter pack, with the wash and go being the hardest to master. These bloggers would wash their hair and apply their products in sections, creating shiny, clumped curls that would dry to become a fluffy yet defined wash and go style. There is a lot more to the hype than just washing and going like this:
The actual wash and go process
To be honest, there is no such thing as a wash and go. The process is more like a wash, condition, detangle, deep condition, rinse, apply products (shingling, raking, or other method”>, plop, scrunch, and your choice of drying — hooded dryer, diffusing, or air drying. My process doesn’t consist of all these steps, but there are many ways to achieve a wash and go. Figuring out the best method for your hair is part of the process.
Actually liking your natural curl pattern
A wash and go is a style created on your hair in its most natural state, meaning there is no twisting or braiding involved. This style can be achieved in a variety of ways depending on what method works for you. Figuring out the best method and products to use are only part of the battle — actually liking your natural curl pattern is the other part. It is important to understand that no two wash and gos are going to look alike and everyone’s hair is different. This is why you must find a method (and products”> that works for you! Many naturalistas dislike their hair due to shrinkage, which cannot be avoided. However, you can adjust your method to elongate your hair, making it easier to confidently rock your wash and go.
Finding products that actually work for you
I truly believe that anyone can rock a wash and go. It all depends on that method and products used, but it is quite possible. I find that after I use my leave-in conditioner, I can use a cream styler, gel, or some other styler to achieve my wash and go. Naturalistas with tighter curls may need to use a gel-based styler and apply on soaking wet hair to lock in their curls to style their wash and go. This is part of the discovery process. Everything may not work for everyone, but there is a wash and go method for you.
I absolutely love how my hair looks in a wash and go. I think the hype lies in being able to rock your natural curl pattern as is without having to go the extra mile with twisting or braiding the hair. Since I’ve been natural, the wash and go has become my signature style and has truly defined what it means to be natural to me.
So Naturally Curly world…How do we really feel about Wash & Go’s?
Have you mastered your technique? Share your Wash & Go pics with us on Facebook!
Maintaining a clean scalp is one of the most important things you can do on your quest to healthy hair. A clean scalp ensures healthy hair growth by improving blood circulation and removing product build up, as well as dirt, sebum, and dead skin cells. Thus, your scalp is able to breathe and provide a healthy environment to foster healthy hair development.
On this quest to healthy hair, many naturals tend to shy away from shampoo because of the harmful, drying ingredients. This is where co-washing comes into play. Now, I do think it’s important to shampoo your hair at least once a month to strip the hair clean and provide a clean slate. However, a great cleansing conditioner can be used to properly cleanse the scalp on a weekly basis.
Co-washing with a cleansing conditioner is not to be confused with washing your hair with a regular conditioner, one that is often used for detangling the hair. Cleansing conditioners have cleansing agents in them that aren’t as harsh as those in shampoos. Your hair and scalp will be properly cleansed and your hair is able to maintain its moisture and not be stripped of its natural oils. Using a regular conditioner to “co-wash” your hair is the same as washing your clothes in fabric softener – it’s something you just don’t do.
With so many cleansing conditioners on the market, it’s hard to decide which ones to use and for what, but I’m happy to help. Here’s a list of cleansing conditioners and whom they suit best:
For Color Treated Hair
Briogeo Be Gentle, Be Kind Avocado + Quinoa Co-Wash
The Briogeo Be Gentle, Be Kind Avocado + Quinoa Co-Wash is an absolute favorite of mine. This co-wash works well on various hair types, especially hair that has been color treated. Hair that has been lightened is often drier than usual, but this co-wash works to hydrate the hair, while thoroughly cleansing it. It also improves hair manageability and aids in the detangling process.
The Be Gentle, Be Kind Avocado + Quinoa Co-Wash is formulated with 3 oils (Rosehip, Argan, and Coconut oils”>, which can be found in a few of the brand’s other products. The Rosarco oil blend protects hair from environmental stressors, tames frizz, provides hydration, softens the strands, and prevents breakage, all of which are important for color treated/lightened hair.
For Heat Damaged Hair
As I Am Coconut Cowash Cleansing Conditioner
The As I Am Coconut Cowash Cleansing Conditioner is a great way to remove buildup and residue without stripping hair dry. Naturals with heat damage that opt to transition need to maintain the hair’s moisture at all times to prevent unnecessary breakage or damage. This conditioning cream cleanser makes detangling easier, helps the hair to retain moisture, while containing ingredients that promote hair growth.
Heat damaged hair is a lot like chemically processed hair in the sense that it is very sensitive and needs a lot of TLC. The As I Am Coconut Cowash Cleansing Conditioner allows users to maintain a clean scalp, while creating a healthy hair environment to make the transition to healthy hair seamless.
For Chemically Processed Hair
Pantene Truly Natural Co-Wash Cleansing Conditioner
The Pantene Truly Natural Co-Wash Cleansing Conditioner is a great co-wash for chemically treated hair. Users can benefit from the “1-2-3 treatment” – cleanse, detangle, and condition – each time they use it, while maintaining the hair’s moisture. I like the 3-benefit treatment that comes with this product because chemically processed hair is normally weaker than unprocessed hair, and this product doesn’t put any additional stress on the hair. This product delivers the right amount of softness and shine that chemically processed hair needs!
I also love this product because it is very inexpensive. It spreads easily, so you don’t need to use a lot, so it’ll be a while before you have to pick up another one.
For Dry Hair
Mizani True Textures Cream Cleansing Conditioner
The Mizani True Textures Cream Cleansing Conditioner is my favorite, especially because it works to “maintain the natural curl pattern for touchable texture,” making it a great product for curly girls. This co-wash is formulated with 3 oils – coconut, olive, and marula – that work together to help maintain the hair’s moisture, while also smoothing, hydrating, restoring, and softening curls. My scalp is always clean after using the True Textures Cream Cleansing Conditioner and my curls are always moisturized and frizz free, which makes styling much easier!
I love using a cleansing conditioner during my weekly wash, especially in the colder months. It allows me to properly cleanse my hair, while maintaining moisture, which is extremely important for a number of reasons – the cold weather outside and the extreme heat indoors is often harsh on the hair and can further dry out curls, and my hair is color treated! In other words, I need all the protection and help I can get. I do like the benefits of cleansing conditioners, but my shampoo is never too far behind.
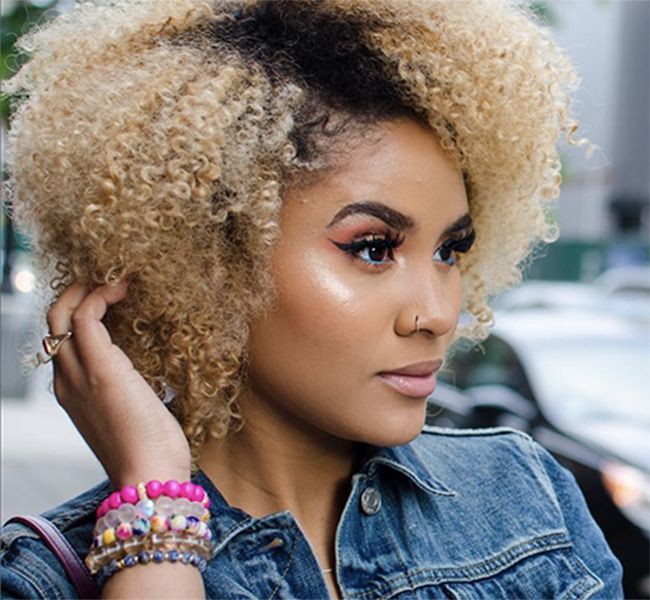
Yes, being blonde is fun, but the investment and commitment needed to maintain the color is what many blondes forget to mention. Being blonde requires a lot of work and upkeep to ensure that your color stays vibrant and your hair is as healthy as possible.
I like to think of myself as a successful blonde, having maintained my length and my curls, which can unfortunately loosen during the color transformation if not done properly. Needless to say, I’m happy to share my tips about how I care for my hair now that it’s blonde.
Adjust Your Trim Schedule
I normally maintain a trim schedule of trimming once every 2.5 to 3 months. I notice that it’s time to trim when I try to detangle my hair and can’t successfully run my fingers through the ends of my hair without getting caught. Now, since my hair has been lightened, I noticed my need to trim my hair more often at every 2 to 2.5 months. Two to two and a half months may seem like a short window, but I can assure you that I maintain all of my length. My stylist is getting rid of those troublesome ends, which come in at 1/8th of an inch or less.
Lightening your hair is a drying process, and the ends of the hair are the oldest and tend to get drier than the rest of the hair at a faster rate. Trimming may seem counterproductive to maintaining length, but the more often you trim your hair, the less length you lose in the end.
Trimming may seem counterproductive to maintaining length, but the more often you trim your hair, the less length you lose in the end.
Tone Down the Brassiness
Blonde shades tend to get brassy when they aren’t maintained properly. This is why it is important to tone your hair while in the salon, to not only achieve your desired shade, but to tone down the yellow tones.
It isn’t feasible, or easy, to see your stylist every time your hair needs toning, which can be every couple of weeks or on a monthly basis. This is where toning shampoos and conditioners come into play. I currently use the Pravana Pure Light Sulfate-Free Brightening Shampoo and Brightening Conditioner, which work immediately after touching the hair. There is no sitting required to see results! I have also used the Clairol Shimmer Lights Shampoo and Conditioner in the past, which is a less-expensive option, but it requires a bit of shampoo time to see results.
Moisturizing Treatments
Lightening processes tend to make the hair dry, so restoring the moisture in the form of a moisturizing treatment is the best way to ensure that it’s properly hydrated. I like to deep treat my hair weekly to ensure that my hair is getting the moisture it needs. I like to use a moisturizing mask of some sort with a heat source like a hair dryer or steamer. I like steaming with moisturizing treatments more because it helps to open the hair cuticle and let fresh water in. Fresh water is key for moisture! My favorite moisturizing treatment is Mizani True Textures Intense Moisture Replenish Treatment and my favorite daily moisturizer is the TGIN Butter Cream Daily Moisturizer.
Strengthen Your Strands
Now that my hair is lightened, it’s important to use a protein or strengthening treatment more often to prevent breakage, which can be a result of lightening the hair. I currently use the ApHogee Two-Step Protein Treatment, which works wonders. After the treatment, I notice that I have less breakage and my hair looks, and feels, much better! When I visit my stylist to have my hair toned, trimmed, or straightened, she uses the Mizani Strength Fusion System, which immediately softens and strengthens the hair. You have to try it and feel it for yourself.
Moisturize it… Again
Blonde hair requires a TON of moisture, so it’s important to keep a daily moisturizer on hand. These moisturizers help keep the ends of the hair, the oldest and driest part, moisturized longer. I moisturize my hair daily by scrunching the daily moisturizer into my hair. Scrunching the product into my hair ensures that it will actually get into my hair, not just sit on top, and it prevents frizz, which can be caused by trying to rub the product into the hair. Thus, my hair stays moisturized and my style lasts longer!
I hope you learned something from my blonde maintenance tips. If you are considering lightening your hair, keep these things in mind, while also consulting with a professional. Then, prepare yourself for more fun!
Want to learn more?
Before you bleach, read the 5 Steps to Prep Your Hair For Bleaching.
On the flip side of the coin, if you’re suffering from bleach damage, read this guide on how to recover.
For more information on conditioning, read The Dos and Don’ts of Deep Conditioning.
Like what you see? For more articles like this, sign up for our newsletter!
Healthy, juicy curls are on every curly girl’s wish list, but anyone with naturally curly hair knows that achieving this glory is easier said than done. When it comes to choosing products for your hair, there is a lot of trial and error to be sure, but try one (or all!”> of the six tried-and-true curly-hair techniques and take all the guesswork out of your styling regimen.
The Scrunch
If you have wavy or curly hair, you know about scrunching. The technique is perfect for two reasons: setting your curls in place (wet hair”> and softening crunchy curls (dry curls”>.
Post-wash, after applying your leave-in conditioner and curl cream, you should part your hair the way you want it to fall when it dries. Once you have positioned your hair appropriately, lean your head toward one side and then the next, taking a section of hair each time and scrunching it by pushing the section towards the root. This will not only enhance your curl, but it will also set your curls.
If you’ve used gel and your hair is almost dry, scrunching it will help to soften any curls that look hard and crunchy. Apply oil to your hands and scrunch from the ends to the root. This gives your curls a soft and full look.
The Praying Hands
The praying hands method, also known as the clapping method, is used to smooth and reduce frizz for curly and coily hair. After washing your hair, apply your leave-in conditioner and then use the praying hands method to apply a styling product like gel or curl cream.
First, rub your styler between your hands. Then, take a section of hair and clap hands together like the praying hands emoji at the root of the hair, pulling them all the way down to the ends and evenly coating your hair in the product. For tighter curls and coils, this can also elongate the curls, if that is something you are looking for.
The Steam Refresh
Shower steam is a great way to reactivate curls and refresh them in the morning. Rewetting the entire head can be timely and it isn’t good for our hair as it reopens and expands the cuticle. However, shower steam provides just enough moisture to help loosen the hair after sleeping on it. I also suggest applying some leave-in conditioner or styling crème after exiting the shower, then twisting or finger coiling some sections for a little definition. Once the hair is dry, shake it out and fluff until it looks just the way you like it.
Start At The Bottom
If the thought of detangling fills you with fear and loathing, this tip is for you. Incorrect detangling methods can wreak havoc on our curls and make the job much harder than it has to be. The best way to fully detangle your hair is to start from the bottom (the ends”> and work your way up to the root. Detangling from the bottom up helps to eliminate tangles so your comb can easily pass through, and it also helps to release shed hairs along the way.
Detangling improperly (from root to tip”> can cause more tangles (as you have not eliminated the original tangles”>, cause breakage (that explains the snapping sound you’ve been hearing”>, and rip your hair out (ouch”>. Make sure you section off your hair and be liberal in your conditioner application. There’s no reason to have a torturous detangling session.
The Pineapple
The pineapple method is a popular way to preserve your favorite styles for great second, third, and even fourth-day hair. The first step to healthier hair, of course, is to wash it less, and this technique will make it easy for you to avoid daily shampooing.
To create the pineapple, gather your hair at the top of your head, and secure it with a scrunchie. Avoid wrapping the hair band too tightly, as you do not want it to leave a crease or dent in your hair. You can also throw on a hair bonnet for added security. You can leave your hair like this for a few hours or overnight. When you’re ready to take it down, just shake it all out, fluff with fingers, and go!
Twist Out
The twist out is a fan favorite among the curly community and a handy tool to keep in your hair styling game plan. A twist out is a form of curl manipulation where two sections of hair are manipulated to create a rope-like pattern. You do this on wet hair and once it dries, you unravel the “ropes” and separate hair depending on the desired look.
One helpful thing to do is apply some oil to your hands before you unravel your twists. This will keep frizz at bay and also add some shine to the hair. If you want super-defined curls, you need to reflect this in your twists, which should be small to medium in size. When you undo the twists, don’t fuss a lot or forcefully separate the strands. For less curl definition and a fuller look, create larger twists and separate as much as you want.
Pay attention to the size of your twists as you get to the ends of the hair. If your twists begin to shrink on the way down, you may be in need of a trim. Your twists should generally be the same size from the start to the very end.
This article was written by Ashley Hall, check out her blog CurlsFoTheGirls.

