Search Results: Nora Huber


Seven months ago I received the new Goldwell KeraSilk Keratin Treatment, and I’ve been paying close attention to the results on my hair ever since. I also got the treatment a second time and had dramatically different results. If you’re interested in trying out this treatment, I’m here to let you know how this treatment performed against its product claims and most importantly, how my curls and waves held up. And to remove any doubt from your mind, this article was not sponsored, it is just an honest account of my experiences.
What the treatment promises
- “Makes unruly, frizzy hair manageable” I say: Yes it does.
- “Softens waves and smoothes the overall hair structure” I say: Yes, but be careful!
- “Reduces the clients’ daily styling time significantly” I say: True.
- The effects are supposed to last up to 5 months. I say: True, but they lasted beyond that.

PICTURED: MY HAIR AFTER THE TREATMENT, STYLED (LEFT”> AND NOT STYLED (RIGHT”>
The Good
- It really did eliminate EVERY bit of frizz. It was extremely effective, and lasted a long time — I still have no frizz after 7 months.
- My hair did not feel damaged. My hair was and still is extremely smooth and silky.
- It protected my hair from dryness. My hair stayed healthy, shiny, and smooth for the whole time.
- It prevented breakage. After seven months and a lot of manipulation (I work as a model and they are not gentle with my hair”> my ends are still full and I have no split ends. My last trim was 5 months ago and have not experienced split ends or breakage since then.
- In the beginning, it generally made styling easier: I was able to get of the shower and use no additional styling product, and my hair stayed frizz-free.
- My treated hair is really strong and healthy.

PICTURED: MY 3B ROOTS AND MY 2B ENDS, AS THE TREATMENT GROWS OUT
The Bad
- It loosened my curl pattern from a Type 3b to a Type 2b. This will vary depending on the strength of the treatment you choose, and of course it depends on your hair goals. If that is what you are looking for you may see this as a positive. But for me I considered this a big negative.
- In my experience the claim that this lasts five months proved to be false. On my hair, the results of this treatment have been permanent. So if you’re looking for a short-term, temporary treatment, then I would not suggest this for you.
- If you use the strong formula and then you decide to stop using it, you will have to transition from treated hair back to your natural curls like you would with a relaxer.
- There is potential for heat damage because the product is sealed into your hair at very high temperatures. Be especially careful if you have fine hair like mine, because fine hair is more fragile and tends to be more vulnerable to damage from heat and chemicals.
- It was easier to style at first, but as my hair grew out it became difficult to blend the two textures.
The Ugly
- Success depends on your stylist: The stylist must follow the guidelines and directions for application correctly. I liked this treatment the first time I got it, but the second time I received this treatment the stylist was not adequately prepared. She mixed up the solutions, giving me the curl eliminating formula, which was not what I asked for and made me regret my decision to try this again.
My final thoughts
So, is it a “good” treatment? In general, yes I had a positive experience and it mostly fulfilled its promises. My advice is that you should be prepared and well-informed before you head into the salon for a chemical treatment, and find a stylist who is very knowledgable. In my experience the “Five months only, semi-permanent” promise turned out to be false. I think this treatment is excellent for curlies who are looking for a considerable amount of frizz reduction, who want to spend less time and money styling the hair on a daily basis, and who have no problems with potentially altering their curl pattern permanently.
Note:This is just my personal experience with my dense, fine, Type 3b curls. I don’t know how this treatment would react on other hair types, so I would recommend that you ask or read reviews by women who have your hair type (including porosity, density, and width”> before you go through with this.
This post was not sponsored and is purely based on my experience as a Kerasilk Keratin Treatment user. Now that you know all that there is to know, make your own choice wisely. You can watch me on YouTube @shalimarcat and let me know how your keratin treatment experience went!
To wash or not to wash
Sure, it seems like you do not have enough time each day to cleanse, condition, and dry your scalp and hair–I completely agree; I work out almost everyday for at least 40 minutes and work full-time. But if you sweat heavily or once your hair starts smelling bad, it is crucial to wash it! Rid your scalp of any possible bacterial, fungal, or product build-up that is clogging your pores. If you did not sweat as much, you might not feel the want or need to wash your scalp as often.
If you opt for walking, a gym session or a yoga class it is much easier than going for a run or engaging in some sort of high intensity interval training (HIIT”>. I have two separates routines: one for the days when I know my workout will be light impact, and one for the days of high impact
My routine for light impact sessions
You can easily workout with curly hair if you keep your body on the mat. What messes up the curls might be your constant bouncing back and forth during jumps and runs; if your body does not move a lot, you can still manage to keep your curl definition intact, even during weightlifting or yoga class.
Remember, no tight ponytails.
Try not to disturb your curl pattern or pull too tightly on your roots. I twist my hair loosely and adjust it with some claw clips or a “bubble hair tie”, so that I don’t get a dent or stretched out, limp curls.
I also use a headband to keep my baby hairs laid down (I use the Save Your Do Headband, but it’s totally comparable to every other cotton headband, so any other headband may work”>.
After I get out of the gym shower, I gently release the headband, shake my curls, spray a refresher like Jessicurl Awe Inspiraling Spray, and add some gel to control misbehaving curls. Since I do not wet my hair completely, drying time is extremely short.
My routine for high impact workouts
Keep your hair ‘stable’ during your more rigorous workouts–this means tightly tied up. Yes, your curls will probably get stretched out. You also sweat a lot more, so it is difficult to maintain the same style as before. However, if you don’t mind rocking looser waves in a stretched out style, you can still be ready in a couple of minutes!
I normally wear my headband and tie my hair in two tight cinnamon buns or just a single top knot cinnamon bun–I like smooth edges! Since the hair is twisted, it’s almost like a twist out set: your hair will have a looser pattern once taken out. I keep the style as long as I can, to let the hair and scalp dry after working out, then I release the buns and use some styling gel or leave in (I like the Briogeo Leave-In for this step”> to control the frizz.
If you have time, spritz your curls with water or a curl refresher until they are almost soaking wet. Then, reapply gel. This will reactivate the styling products already in your hair and the gel will take care of any unruly strands.
You will save some time since you won’t have to wash it completely. The drying time will still be an issue, though. I normally try to concentrate my HIIT days when I have to completely wash my hair so that I can workout without worrying about my style.
A protective stretched out style like a Curlformer set, roller set or a twist-out will allow you to rock up to a week of nice hair with just the use of some dry shampoo.
All you have to do is to tightly put your hair in a bun on top of your head (this will allow the sweat to drip down without wetting the hair too much”>, use a headband for your edges and simply wait for your hair to be completely dry before taking out the headband or the bun. You will be left with polished beachy waves.
This is my preferred method–especially now that I am transitioning. Be sure however to wash your hair if you sweat really a lot or if your hair simply feel gross: a dirty scalp is not healthy and can stop your hair growth or make your hair fall out.
Read more by Nora
My Favorite Curly Girl Method Products for Wavy Hair How I Transitioned from Wavy to Curly Hair 11 Curly Hair Rules I Love to Break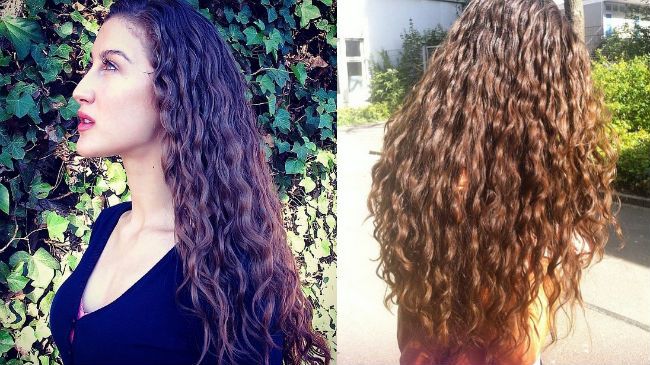
I like to define myself as the rebel in the curly hair community. Don’t get me wrong, I love my curls, but most of all I like the fact that curly hair is so versatile. I can easily pull off a straight style the same way I can rock a cascade of curls.
It took me a bit of time to master the ability to mold my hair as I want it to be. Here are my ultimate and fool-proof secrets to wearing your hair straight, with the least amount of damage possible (and if you already saw my hair, you know it’s possible to have extremely long healthy hair even if you straighten it”>.
The DO’s
1. Prep the hair: Use a protein deep conditioner prior to straightening the hair. My favorite is the Living Proof Recovery Mask or the Briogeo Repair Don’t Despair Mask. This will fill the gaps in the hair cortex, making the hair more resistant.
2. Be sure that your hair has the proper amount of moisture too! Hair that is too saturated in proteins can be hard and breaks more easily, so maintain a good balance in your daily routine and use proteins when you need an heavy duty protection.
3. Use an effective leave-in: Search a leave-in that is water based to add moisture (aka elasticity”> to the strands before straightening it. My favorite is the Living Proof PHD Leave In. It has also heat protection in it!
4. Use a heat protectant: This step is extremely crucial. It’s important to understand what are the ingredients that give us protection against heat: silicones (yes!”> are the most effective, and allow also your brush to glide through the hair minimizing breakage. Then proteins (soy protein, keratin, wheat… You got it!”>, and ceramides. My favorite heat protectant is the Alterna Bamboo Heat Protectant, or if you are on a budget, the Tresemmé Thermal Creations Heat Protectant.
5. Detangle: Make sure your hair is 100% tangle-free before starting! The tugging and ripping on tangled hair is the first cause of breakage! Detangle your hair in the shower after letting the conditioner sit for a while.
6. Use quality appliances: Choose a blow dryer that has a nozzle (is there still someone that doesn’t use a nozzle?!”>, a good wattage (from 1800w to 2400w is perfect”>, ions and infrared heat. If you can splurge, the T3’s are the best out there. If you live in Europe or you want a cheaper alternative, try the Sony Protect Hair Dryer. It has a “temperature protect” setting that allows you never to use too much heat on the hair!
7. Invest in a good brush: Choose a ceramic round brush. The best one you can find is one that changes color when the temperature is too high. Ceramic brushes smooth hair better than boar bristle brushes, with less heat. Buy two brushes, a big one for larger sections, and a small one for details and the front part.
8. Dry the hair 80% of the way before using the brush: You can save your hair a bit of heat putting it in a microfiber towel and letting it dry that way, or blast the hair with cold to warm heat, paying attention not to tangle it. Wet hair doesn’t hold the shape, and you have to spend more time on every strand, tugging and heating it, which equals more damage.
9. 4 sections: I divide the hair in half at ear level, and then the section in other two parts, right and left. It keeps your wet hair away from the dried hair and allows you to be more ordinate. Feel free to try more sections if your hair is curlier! Start always from the bottom and make your way up to the top.
10. Dry stubborn areas (like bangs”> first: If you let them dry too much, they will curl and they will never be super straight. So attack those bangs first, then pin curl them away. It’s also useful to use your small brush for this areas.
11. Use the lowest heat temperature possible: Start with cold hair (fine hair can be molded also with cold hair!”> and if that doesn’t work, increase the heat gradually.
12. Dry every section 100%: Never go to the next section unless you are sure the hair you are working on is perfectly dry. Have you already experienced the “straight hair to poofy hair in minutes” situation after you straighten it? It’s because your hair still had too much moisture in it which allowed them to swell once you finished your hard work: not a pretty look!
13. Blast hair with cold air to lock the style in place and remove the last humidity. Dry the scalp if you sweated during the process (hey, it’s a good arm workout”>.
14. Seal the hair with a serum or oil: I like pure argan oil, just a drop.
The DON’Ts
1. Use a flat iron: This is a big no-no. Blowdryers use lower temperatures to give you the same results. It’s just a matter of practicing and right tools (brushes…”>. Save the flat iron for little touch up’s (like stubborn hairline curls”> but don’t use it on the whole head.
2. Use water based products the days after: Water will revert the hair back to curly. Make sure the products you are using on your straight hair are water free (that means oil based or silicone based”>. Stay also away from humectants and glycerin.
3. Wash your hair more than 2x week when straightening: Try to extend your style with dry shampoos so that you don’t stress your hair too much.
4. Pretend too much: You know your hair. If you have baby fine bleached hair, don’t think you wont ruin your hair straightening it. You will. So be honest with your hair and know if you can actually do it.
5. Over-stress your hair: Choose one of many evils. If you want to wear straight styles often, forget the bleached look, the colored hair. Colored and bleached hair are already super fragile, so you can’t use the same amount of heat of someone with virgin hair.
6. Forget about heatless options: If you have time, you can use one of this method to straighten your hair without heat: Curl Formers, wraps, curlers…
7. Concentrate all the heat on the ends: Dry the roots first, leave the ends for last, and don’t over brush them. Your ends are the most fragile part of your hair!
8. Hate silicones: I am all about silicone free products for my curls (aka CG method”> but when it comes to straightening hair, I enjoy the protection they give me. So don’t be afraid to use them (you can easily wash them out with a bit of shampoo”>.
9. Forget that it’s YOUR hair. YOU decide how to wear it. Don’t let anyone tell you that you are not “natural” because you want to play with your hair.
Nora Huber (YouTube: Shalimarcat”> shared with us her commandments on straightening fine, wavy-curly hair without using a flat iron. Follow on her on Instagram here.
When I started the CG method back in 2009, there was little to no information available.
Starting the Curly Girl (CG”> Method was the best personal decision I had made for my hair. I used to hate my type 2 waves because they were frizzy and dry. Now my hair grows at a faster rate and it is much longer, shinier and overall healthier. I live in Europe, so there were no products available that were compatible with the CG method, though over the years that has changed. But no matter where you live, starting the CG method can be overwhelming.
I hope this guide will make your introduction to the CG method easier! I included product suggestions and options whether you want to save or splurge, and included a few European products for those who might need them.
Ingredients
There are two common ingredients that CG Method followers avoid:
1. Sulfates
Sulfates are very harsh detergents that make your curls dry and frizzy. Sulfates are necessary for eliminating product build-up caused by non-water soluble silicones, which are polymers that wrap the hair making it appear shinier and helping in detangling. Some curlies choose to eliminate sulfates completely, while others use them as little as possible for clarifying washes.
2. Silicones
Silicones can be found in many detangling and styling products because they can provide shine and slip, however applying silicones to your hair frequently can lead to buildup that requires sulfates to be removed. This means that if you are avoiding sulfates, you will also need to ditch silicones.
For a full list of the good, the bad and the worst silicones, read here.
Choosing CG-friendly products
Depending on the condition of your hair–thickness, density and curl pattern–you may decide to ditch all detergents and just use conditioner to cleanse your hair. This is also known as the co-wash method. The other cleansing option is to continue to use gentle, sulfate free shampoos. The key is experimenting and finding out what your hair likes.

My favorite co-washes
Wash your hair every time you feel the need–whenever it is dry, whenever it is tangled, or whenever you want to refresh your wash-and-go. If you co-wash, remember to massage your scalp at least 2 to 3 minutes to really allow the conditioner to work and lift dirt from your scalp.
- As I Am Coconut Cowash ($9.00″> works like a charm and it is packed with amazing ingredients to stimulate hair growth.
- DevaCurl No Poo ($22.00″> is a CG must-have.
- Suave Essentials Tropical Coconut ($1.89″> is cheap, effective, and has a divine smell.

My favorite shampoos
- Briogeo Be Gentle Be Kind Green Tea Shampoo ($24.00″> is perfect for every curl texture! Full of natural ingredients that will actually do something!
- SheaMoisture Jamaican Black Castor Oil Strengthen, Grow & Restore Shampoo ($12.19″> uses only a tiny amount that goes a long way–it’s so moisturizing, too.
- BONUS European options: Splend’Or Balsamo al Cocco to co-wash (it’s a worldwide holy grail”> and the Garnier Fructis Pure Clean Fortifying Conditioner. All of the Lavera shampoos work well, too.

My favorite conditioners
The best opportunity to detangle your hair is while you’re conditioning. The key is to find a conditioner that is moisturizing, not heavy and has a lot of slip. If you are co-washing, you don’t need to use a conditioner afterward, but if you are using mild detergents, this step is a must.
- DevaCurl One Condition ($44″> is hands down my favorite conditioner, ever!
- Jessicurl Too Shea Extra Moisturizing Conditioner ($49.95″> –when they say moisturizing, they mean it.
- Oyin Handmade Honey Hemp Conditioner ($22.99″> softens, moisturizes–and smells delicious.
- SheaMoisture Manuka Honey & Mafura Oil Intensive Hydration Conditioner ($9.99″> for intense moisture and a divine smell.
- GVP Conditioning Balm ($12.95″> is comparable to Matrix Biolage and is a holy grail for many curly girls.
- BONUS European Options: Lush Veganese Conditioner or Lavera Rose Milk Repairing Conditioner.

My favorite deep conditioners
You must deep condition your curly hair regularly. It will keep your hair shiny, nourished and strong. I usually deep condition in place of normal conditioner every time I wash my hair because I like the added benefits of a mask, but most naturals use them once every 3 washes or so, or once a month. The best thing you can do is to use them with some sort of heat (hooded attachment, hooded dryer, steamer, a bonnet”>.
- Eden BodyWorks Jojoba Monoi Deep Conditioner ($9.99″> contains everything you need for softer, stronger curls.
- Briogeo Don’t Despair, Repair Deep Conditioning Mask ($36.00″> is the best mask. Point!
- BONUS European Options: L’Oreal VIVE Nutri Gloss Intensive Shine Mask (in the pink jar”> or Lavera Rose Milk Hair Repair Mask.
My favorite stylers
Styling is (in my opinion”> the most important step in the whole routine. In my experience every strand should be generously covered with a styling product, or else you will experience a lot of frizz. There are a lot of methods curly girls use to apply their favorite styler–my favorite is the Rake & Shake method or Scrunching technique.
- DevaCare Arc AnGEL ($27.44″> It has a really nice hold, smells like lemonade and it always gives good second day hair.
- Jessicurl Spiralicious Styling Gel ($16.95″> gives a lot of definition and controls the volume.
- L.A. Sport Look Gel ($8.33″> an old tried and true classic product, and so affordable!
- BONUS European Options: Nivea Styling Flexible Curls, Phyto Phyto Professional Strong Sculpting Gel, Schwarzkopf Taft Gel Power Gel
My favorite refreshers
Refreshing your hair after sleeping on it is a vital step for curly hair that has lost its shape. Normally the styling products reactivate themselves once you have slightly dampened your hair. Plop with a T-shirt or diffuse and scrunch for more curl definition.
- Jessicurl Awe Inspiraling Spray ($16.95″> is gentle, light, and gives your curl their bounce back.
- Water
Wash, condition, and repeat. It will probably take your hair a couple of weeks to adjust to the new routine. Realistically, you can expect to see your natural curls looking limp and lifeless before they really start to really blossom. Do not quit the CG Method, your best curls will be here soon enough. Welcome to this new world of beautiful naturally curly hair!
Did I miss any of your favorites?
Winter can be really tough on our naturally wavy and curly hair. Cold weather dries our strands out, our favorite scarfs and bonnets keep rubbing against those poor ends, resulting in the biggest enemy for the hair: the split ends!
Split ends are dangerous because they weaken the hair, in turn causing breakage. Not to mention, they are not very aesthetically pleasing. The only real way to deal with them is to cut them out. But sometimes we simply don’t have the time or money to go visit our fancy Deva Cut Hairstylist and as we know well, just any stylist won’t do. Sometimes getting an appointment can take weeks!
In the meantime, deal with your frizzy split ends at the bottom of our hair by tucking them away. These hairstyles are amazing at keeping our ends protected after or until your next trim.
Sock Bun
A bun is always the best way to go–it’s easy to do, practical, and suits every face shape. You can dress it up or down, make it more professional or casual. But if you can, avoid a super messy bun since it can show a lot of your ends if you’re not strategic in their placement. A sock bun should help that.
My favorite is the top knot–or ballerina–bun. Do a high ponytail, then simply twist the hair around itself and around the base of the ponytail, creating a cinnamon bun. Use bobby pins to keep everything in place. If you have a lot of layers (or your split ends are not all on the bottom half of your hair”>, avoid the fuzzy flyaways by rubbing your hands with some molding paste or clay while twisting. This trick will keep the strands tucked together, longer.
French Roll
The French roll is an elegant style that is for the more expert hairstyling wavy girl. It can get tricky! The French roll is bigger and cuter than a French twist, which makes it hold better.
Brush all of your hair to one side, then put a row of criss-crossed bobby pins in the middle, starting from the nape and working to the top of your head. This will keep all of your hair to one side. Then wrap the hair back over the pinned section rolling the ends smoothly inside. Secure it with more bobbypins!
Braided Side Bun
This is inspired by the beautiful Katniss Everdeen of The Hunger Games movies. Since we can’t leave our braided out because we need to hide our ends, we have to roll them up into a bun.
Start with a French braid that goes from your parted hair, down to the end of your hair. Gathering all the hair, keeping the braid to the side and behind your ear. Secure with a clear elastic band and then simply roll up the braid into a bun! Secure further with bobby pins. If you are feeling brave, create a braid that goes from one side of the head to the other, truly à la Katniss!
And…
If you can’t fix it right away, just hide it! far from the eyes far from the heart!
With so much going on in our busy lives, we don’t always have time to dedicate to shampooing our hair everyday. Besides, your hair health would suffer if you did. If your hair tends to look greasy after a long day of work, school, and exercising, give dry shampoo a try. If you haven’t added one to your locker, purse or backpack yet, you’re missing out.
What is a dry shampoo?
Dry shampoos completely refresh your greasy roots in between washes, allowing you to get more days out of your last style. No time to wash your curls? No problem. Just a little sprinkle of that magical white powder and all is good. And believe it or not, the idea of dry shampoo is not new. It has been around for decades now; I still remember my grandma telling me about how she used to stretch her style with none other than talcum powder.
The history of talcum powder dry shampoo
Talcum powder (also called talc for short”> was the first ingredient used to practice the dry shampooing method. Now it has evolved into cute, fancy aerosol can versions that are widely available at most drugstores and beauty speciality stores.
Before 1973, talc products for cosmetic use were not regulated; asbestos were often found in them. Researches found that talc inhalation were collecting in people’s lungs near asbestos deposits. Asbestos deposits are minerals shaped in a long, thin way (it is different from the majority of the normal inhalation particles–long shaped deposits are the culprit for lung cancer, asbestosis and mesothelioma”>. Since 1973, however, every regulated cosmetic talc product has to be free of the cancer causing particles.The link to cancer
In 1993, the US National Toxicology Program published a study about the possible links between talcum powder and lung cancer, while another study in 1997 by the Oxford Journals (Cook, L.S., M.L. Kamb, and N.S. Weiss, Perineal”> showed that talcum powder exposure led to a greater risk of ovarian cancer. National Institute of Health (Am J Epidemiol, 1997. 145(5″>: p. 459-65″> also connected ovarian cancer to the perianal use of asbestos free talcum powder. But today, this is not considered valid. The study failed in showing a causal link–and the increase in ovarian cancer was attributed to other factors.The IARC’s classification of talcum powder as a ‘possible’ carcinogen reflects the inconclusive state of today’s evidence. Further research is needed to determine if and how talcum powder might increase the risk of ovarian cancer.
The Cosmetic Ingredient Review Expert Panel assessed the safety of talc for use in cosmetics and concluded that talcum powder is safe for use in cosmetics.
The US Report on Carcinogens covers cancer causing substances, and magnesium trisilicate, from which talcum powder is produced, is noticeably absent from this list (U.S. Department of Health and Human Services, 12th Report on Carcinogens. 2011, Public Health Service-National Toxicology Program“>.
The Cosmetic Ingredient Review Expert Panel assessed the safety of talc for use in cosmetics and concluded that talcum powder is safe for use in cosmetics. However, they noted that it should not be applied to skin when the epidermal barrier is missing or significantly disrupted (due to infections”>.
So, is talcum powder dry shampoo good or bad?
Lung cancer is not related to cosmetic talcum powder now that since it has been regulated to be completely asbestos free.
Talc-free dry shampoo options
If you prefer to avoid talcum powder dry shampoo altogether, corn starch is another excellent oil absorber and can be found in several natural dry shampoos. You can also find store bought talc-free dry shampoos:
- Lulu Organics Hair Powder
- Burt’s and Bees Baby Bee Dusting Powder
- Alterna Haircare Caviar Dry Shampoo (note that this is not Curly Girl method approved because it contains silicones”>
Do you use talcum powder as a dry shampoo?
If you are an avid DIYer and a fan of aromatherapy, you certainly know about essential oils.
Also known as ethereal oils, essential are very concentrated liquids derived from plants containing their aroma. They contain the essence of the plant and are obtained by an extraction process that uses mostly steam.
Essential oils are found in almost everything, from beauty products to perfumes to food. In the past they are also largely used for medicinal reasons to treat a wide range of problems from skin diseases to cancer. Nowadays the use of essential oils in western medicine is almost nonexistent; however, they are widely used as aromatherapy in alternative medicine.
According to the U.S. National Library of Medicine National Studies, thymol has antiseptic properties. Menthol produces a sensation of cold, while tea tree oil can be used as a bactericidal. All of these can also make a positive impact on contact dermatitis and acne. Grapefruit essential oil is used in many natural cosmetics because it is a potent preservation capabilities.
When an essential oil is more pure, there is a higher risk of toxicity when used internally or applied to the skin.
The risk
Being so concentrated, essential oils can be toxic and dangerous. When an essential oil is more pure, there is a higher risk of toxicity when used internally or applied to the skin. Pure essential oils should be used with extreme caution or only for aromatherapy. Applied pure on the body they can cause redness, contact dermatitis, severe allergic reactions and hepatotoxicity. Essential oils derived from citrus fruits can cause photosensitivity and rushes when applied during the day. Essential oils are lipophilic–they can be diluted only in oil or ethanol.
If you are a pet owner, be careful–essential oils can be extremely toxic for our little furry friends. Also, if you are an expecting mother, avoid using essential oils. There is not enough evidence and research that guarantees they can be safely used during pregnancy.
Mix with a carrier oil, first!
When using essential oils at home, I recommend diluting some drops of essential oil in a carrier oil like jojoba, coconut, olive, almond, grapeseed, or argan oil. Never rub a pure essential oil directly on the skin; if you don’t get a contact dermatitis right away, it could sensitize the skin in the long run, leaving the dermis weakened and unable to fight against common environmental pathogens like dermatophytes.
Never rub a pure essential oil directly on the skin
When used correctly, essential oils can be extremely beneficial to our hair. In my opinion, the best carrier oil is jojoba oil, because it is most similar to our skin’s natural sebum, but here is a list of other common essential oils and their benefits, according to Aroma Zone.
- Grapefruit Oil: This is used as preserver in natural cosmetics.
- Bay St. Thomas Essential Oil (Pimenta Racemosa”>: Helps restore thinning hair and slows the loss of hair by naturally increasing its growth rate.
- Nard Jatamansi Essential Oil (Nardostachys Jatamansi”>: This oil also increases the hair growth rate.
- Rosemary Essential Oil (Rosmarinus Officinalis”>: This is excellent in bringing luster to darker colored hair and stimulates the scalp, too.
- Ylang Ylang Essential Oil (Cananga Odorata Totum”>: It makes the hair reflect light more and produce stronger strands.
- Bergamot Essential Oil (Citrus Bergamia”>: Like all citrus fruits essential oils, this one gives off photosensitivity. Use it in the night or chose a variety without furocoumarins.
- Chamomile Essential Oil (Chamaemelum Nobile”>: used to achieve golden reflexes, especially on blonde hair.
- Cedar Essential Oil (Cedrus Atlantica”>: It treats scalp issues like dandruff and helps to grow healthy, stronger hair.
- Curcuma (Curcuma Longa”>: It is rich in antioxidant properties, it can be used safely on colored hair to prolong the vibrancy oft he color.
Another quick way to safely use essential oils is to pour a couple of drops in a drugstore conditioner: you will turn a cheap product into a 5-star one!
How do you use essential oils? Which are your favorites?
Writer Nora Huber (also known as Shalimarcat”> is currently a dermatology and plastic surgery resident.
If you are a loyal reader of my articles–and you totally should be!–you have followed my experiences with keratin treatments. My hair felt and looked really healthy the first time I did the treatment, but the stylist who applied it last time mixed it with a relaxer formula (unbeknownst to me”> so I had to say bye bye to my curly hair. That was so not what I had signed up for.
Fast forward to: now.
I am dealing with two textures on my hair: the ends of my hair have the keratin/relaxer in it, so they are slightly wavy (and since I have long hair, that is a lot”>; the roots of my hair are a lot curlier.
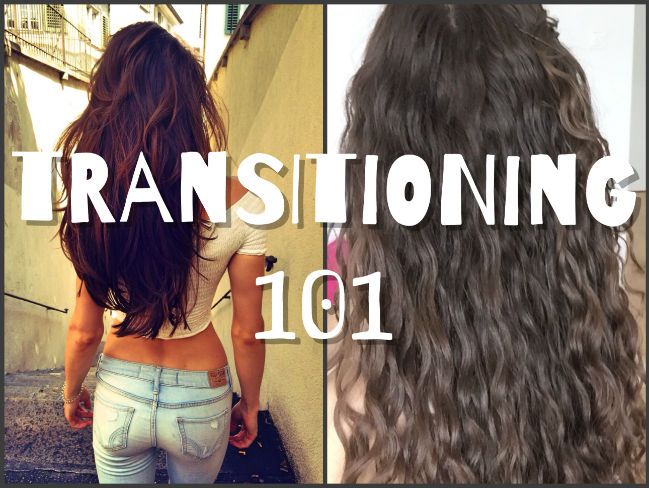
Transitioning with wavy hair can be so frustrating at times. During this past year, I have had to learn to cope with my new “in-between” hair. If you are going through the same as me, I hope my tips will help you through your transitioning phase as well.
These days, I wear my hair in stretched out styles more than ever.
Now that I have two different textures, wearing my hair curly sometimes makes me want to cry. That’s how bad it makes me feel. Stretched out styles allow my hair to appear the same in texture from top to bottom, which for me is a luxury now. I may blow dry my hair straight or use my Curlformers method to get gorgeous bombshell waves.
Lucky for me, my hair is not sensitive to heat damage. I used to blow dry my hair every day before I discovered the CG method, and I never really noticed a change in texture. And although I am not afraid of a little heat damage, I still keep the temperature of my blow dryer on the lowest setting and I use heat protectant products.
I also rarely use a flat iron, and if I use it I keep it on the lowest setting as well. My blowouts usually last for 7 days. I do them a maximum of 4 times per month.I am more selective about styling products.
With my hair in its current state, I reach for specific styling products that will help me merge the two textures together. I need something that makes my hair curlier, or a heavy styler that stretches out my roots. My favorites at the moment are:
- Ouidad Tress Effects Styling Gel: it provides an excellent definition and stretches the curls out a bit. It is also good on 2nd day hair.
- Jessicurl Rockin Ringlets Styling Potion: One of my Holy Grails since I can remember. It contains epsom salt, which makes my bottom layer of hair appear curlier. I avoid putting it on the roots so that the two textures look more similar.
- TreLuxe Hi! Definition Curl Enhancing Styling Gel: defines my hair really well, takes care of the frizz and it’s heavy so that my roots are stretched out.
- Ouidad Sea Salt Spray: This sea salt spray is awesome, because it is so moisturizing but it also really helps my curls to pop more! (Read my full review“>
- Aphogee Curlific! Texture Treatment: This stuff is like unicorn magic! It really helps in getting more curls on the bottom part of my hair! It also makes my hair feel extremely soft and repaired.
I get frequent trims now.
I tend to trim my hair a lot more than before. I used to cut my hair once a year since I have almost no split ends and my hair is really resistant to breakage. Now I am cutting my hair every 3 months to get rid of the straight part faster. I am too afraid to go shorter, but if you have the guts to do it, it can be very liberating! I try to have some layers in my hair too, because layers help the curls to pop more. Be sure not to over-layer your hair or you will have super curly hair on top and a mullet of straight hair on the bottom–not cute.
I take supplements.
I want my straight ends gone ASAP. To speed up the hair growth I use supplements. I take Viviscal 2x/day, because it’s the only supplement that has some real clinical trials made on it. Check them out on PubMed and don’t buy supplements that are not being tested. You can seriously damage your liver and kidney!
I love a good braid-out or twist-out.
Yes, looser textured curlies can rock these styles. Check out my video above to see how I get a pretty twist-out on wavy hair. This will help make my hair more uniformly wavy, and it is the perfect summer style. To get a straight style without heat you can wrap your hair when wet, and let it dry overnight. If you have super thick or long hair… it will take you ages, but if you have finer or shorter hair you can totally rock it.
Above all, I have learned to be patient!
Yes, I know. It is so hard. But that is what I have to do. If you are in a similar situation in your journey, trust me – your curls will grow back before you will know it. If you are a long term transitioner, calculate 2-3 years of hair growth. If you are braver, you can easily big chop after 1 or 2 years.
Congresses, meet-ups, workshops? Nope.
And that is a pity…
Because all those gatherings for natural hair lovers and wearers are essential to spreading the voice and to make natural hair beautiful everywhere in the world. Every woman, from China to Spain, from Ghana to Norway, has the right to feel confident and beautiful with the hair nature has given her.
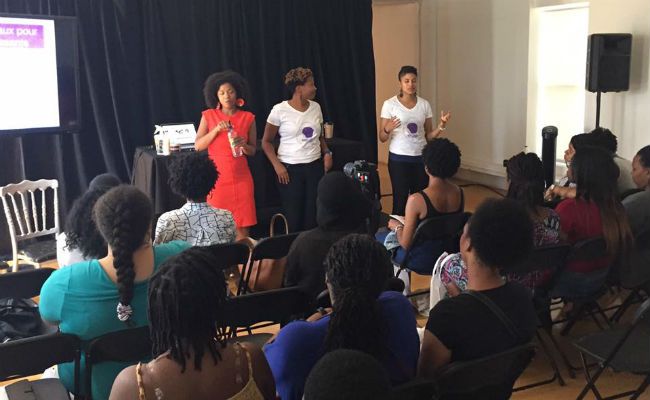
This is why I was so pleased to learn that Inhairitance Curl Spa hosted its inaugural natural hair congress. Focusing on sharing awareness on the care and beauty of curly, kinky, wavy and locked hair on June 27 in Montreal, Canada! This is definitely a step forward.
According to Abisara Machold, owner of Inhairitance, this congress is for “men and women of all backgrounds, curly girls, naturalistas, transitioners and curly hair fans to come and discuss with certified experts, meet various industry craftswomen and discover the best natural hair products on the market.”
Machold also reiterated the reality of the current international situation:
“Only a few specialists are trained to cut and care for curly hair. Each curl has its size and personality. We hope through this conference to offer an exchange platform on aesthetics, but also on the socio-political aspect of wearing our naturally curly and kinky hair.”
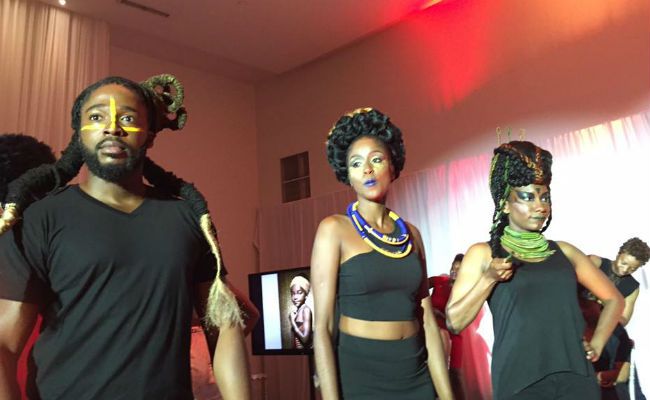
The congress included speaking panels, workshops, and a live hairstyling competition. Among the group of panelists was Stacey McKenzie, a Canadian fashion model, who had also served as a judge on Canada’s Next Top Model. Nerissa Irving, another gorgeous model with long locks, also served on the panel. She organizes workshops with a focus on hair and sexual health.
It was a huge and important moment for the international hair community. Now I hope that other countries will do the same and start hosting more congresses and workshops to spread the curly hair love and knowledge everywhere!
Like everything in life, balance is crucial to maintaining healthy hair. You may be using the most popular or expensive deep treatments with the aim of keeping your curls healthy, but if your regimen does not give your hair a balanced amount of protein, it will be all for nothing. Your hair will be at risk of high amounts of breakage.
Too much protein
If you have been searching for a remedy for your dry or damaged hair, then you have likely come across recommendations for more protein. Protein can help, no doubt. But it is important not to overload the hair with proteins, because this can be extremely counterproductive.
A protein overload can cause the hair to become harder, less elastic, and extremely fragile.
A protein overload can cause the hair to become harder, less elastic, and extremely fragile. Your hair will start to break off even with minimum handling, things like gently detangling your hair or doing an updo. If your hair has too many proteins, it will break with the simple contact with your clothes.
Proteins can still be wonderful because they fill in the gaps in our cuticles, making our hair stronger. The molecules are big enough to sit on the surface of the hair strand and provide a degree of protection, making the hair appear fuller and more resistant. When there is too much of it, however, the hair becomes saturated with proteins and loses all of the elasticity that allows us to manipulate our hair without breaking.
What to look for
If you are experiencing a protein overload, your hair will feel brittle, dry and frizzy. Your curls will appear less bouncy and you will experience significant breakage with low manipulation of your hair.
How to test
Try to pull a single hair and notice how it breaks: a protein saturated hair will snap with ease and it won’t be elastic.
If your deep conditioner or styler proteins listed in the first five ingredients, make sure you are alternating your use of these products with products that have little to no proteins to avoid over saturating the hair.
Note: If you are struggling to differentiate between naturally shed hair and breakage, look for a little white dot on one end of the hair: that is a hair that has completed its normal cycle and it is physiologically shedding. If you don’t find a white dot, it is typically a broken hair.
Here are examples of deep treatments that you can alternate between so that you are giving your hair balanced care.
Protein Rich Deep Treatments
- Aphogee Two-Step Protein Treatment
- Curl Junkie Repair Me! Reconstructive Hair Treatment
- SheaMoisture Tahitian Noni & Monoi Hair & Scalp Weekly Therapy
- Mop Top Deep Conditioner
- Curly Hair Solutions Pure Silk Protein Deep Moisturizing Treatment
Protein-Free Treatments
- Jessicurl Deep Conditioning Treatment
- Curl Junkie Curl Rehab Moisturizing Hair Treatment
- As I Am Hydration Elation Intensive Conditioner
- SheaMoisture African Black Soap Purification Masque
Even the protein sensitive need proteins
If you are one of those women who has found that their hair is protein sensitive, it is possible that you may be overdoing it on the moisturizing front. In this case you may find that your curls are often frizzy and undefined.
RELATED: How to Test for Protein Sensitivity
If you are in fact protein sensitive, then you have probably been avoiding proteins, but be careful! Your hair may be sensitive but you still need a degree of proteins in your haircare regimen. Typically protein sensitive people are more bothered by the proteins found in styling products like leave-ins, gels, curl creams, than they are by protein rich shampoos and conditioners. This is because the proteins found in shampoos and conditioners are washed out in the shower, while the ingredients of your styling products and leave-in conditioners stay in contact with your hair for much longer periods of time.
The danger in avoiding all kind of proteins is that your hair will lose the outer layer (cortex”>, may become so elastic that it will be extremely fragile. Especially if you are used to doing long deep treatments, your hair will macerate in the moisture, losing all the structure that makes it resistant to breakage.
What to look for
If you are experiencing moisture overload your hair will feel extremely soft but frizzy, lacking structure, definition and volume.
How to test
Try to pull a single hair and notice how it breaks: moisture-overloaded hair will elongate a lot before breaking, feeling extremely elastic and soft.
If you are protein sensitive, try to incorporating a product with protein in it into your routine once in a while. I would not suggest the Aphogee treatment if you are protein sensitive because it is a strong protein deep treatment, and strong protein treatments will have proteins (hydrolized keratin, hydrolized wheat proteins are commonly found”> in their first 3-5 ingredients. The ingredients on the back of a product are listed in order of quantity, with the first being the one with the highest percentage in the formulation, typically this is water. For protein-sensitive people I would suggest using products that do not have proteins in the first 6-8 ingredients, like Briogeo Don’t Despair Repair Mask.
[prodmod]How to find proteins on your label
Here is a list of protein ingredients as they will likely appear on your hair product labels:
- Cocodimonium hydroxypropyl hydrolyzed casein
- Cocodimonium hydroxypropyl hydrolyzed collagen
- Cocodimonium hydroxypropyl hydrolyzed hair keratin
- Cocodimonium hydroxypropyl hydrolyzed keratin
- Cocodimonium hydroxypropyl hydrolyzed rice protein
- Cocodimonium hydroxypropyl hydrolyzed silk
- Cocodimonium hydroxypropyl hydrolyzed soy protein
- Cocodimonium hydroxypropyl hydrolyzed wheat protein
- Cocodimonium hydroxypropyl silk amino acids
- Cocoyl hydrolyzed collagen
- Cocoyl hydrolyzed keratin
- Hydrolyzed keratin
- Hydrolyzed oat flour
- Hydrolyzed silk
- Hydrolyzed silk protein
- Hydrolyzed soy protein
- Hydrolyzed wheat protein
- Keratin
- Potassium cocoyl hydrolyzed collagen
- TEA-cocoyl hydrolyzed collagen
- TEA-cocoyl hydrolyzed soy protein
Do you use protein treatments as part of your hair care routine?
I don’t know about you, but I get bored pretty quickly with my natural hair color.
If you liked my tutorial on how to lighten your hair naturally, you will like this one too! It is super simple, everyone can do it. I have two versions, one is really for the laziest out there, the other is for the DIY lovers. When coloring my hair, I normally opt for a color gloss because it gives my hair more color depth, adds shine, it won’t change the color of my hair completely and it normally lasts only 3 to 6 weeks. It is also a good treatment to do in between salon visits to refresh the color!The Lazy Gloss
Ingredients:
- your favorite hair mask
- temporary hair color in any color (like Bigen or Sebastian’s Cellophanes”>
Mix in a ratio 1:1 and apply to your hair for 10 to 30 minutes, depending on how strong you want the color to show. You may be thinking “what is the difference between applying a toner alone?” First, you are killing two birds with one stone–you will have a nice color and super soft hair. Second, I always find that applying those toners can be quite difficult: it gets messy and I always have problems distributing the color through my hair. Mixing it with a mask that has a lot of slip helps a lot with the application. Just be sure to wear gloves and an old T-shirt!
The Expert DIYer
Ingredients for brunettes:
- Your favorite hair mask
- Black walnut shell powder
Black walnut shell is one of the best temporary natural stain for brunette hair: it has a cool undertone and gives you beautiful deep reflexes, without brassiness involved. The powder has a big staining power, so be sure to use old towels, T-shirts and gloves! If it gets on your skin, it can takes up to a couple of days to wash off. Mix it with some water until you get a mashed potatoes texture, and leave it to rest overnight. This will ensure a stronger staining power.
The next day, simply mix your wet powder with the hair mask, stir well and apply. Leave it on for 2 to 3 hours, or even more if you have time, and then carefully wash it off till the water runs “clear”.
If you have red hair or you want red reflexes, proceed as above but substitute the Black walnut shell powder with natural henna powder.
Did you already try other way to give your hair a nice gloss? Do you prefers the natural hair dyes or the synthetic hair dyes?
I live in a country in the middle of Europe–we have the advantage of being able to go basically everywhere in a short amount of time. Traveling a weekend away (or more”> with curly hair is not an easy task, though. With straight hair the only thing you need is a brush and a bottle of shampoo. Or maybe even less, since hotels normally provide little sample sizes of hair products.
But travelling with curly hair? That is a whole ‘nother story.
Stylers, combs, picks, cleansing conditioners, leave-ins, gels, finishing sprays. It can easily takes up more space than clothes! Not to mention all the Airlines rules, that allow you to carry only a small amount of liquids in the carry on. (Be careful because some airline companies don’t allow you to bring more than 1L in total in your carry on, so consider your face creams, body creams, and so on!”> Here are my insider tips on packing your hair care efficiently for a trip.
The Weekend Escape
For a short 2 days trip I normally use only a carry on bag that I take with me in the cabin: I don’t have time to waste waiting my bag!
Travel light, be honest with yourself. Do you really need 4 pairs of shoes for a 2-day trip? Probably not. This also applies to hair products. If you follow the No Poo Method, there is a great chance you won’t wash your hair. Just to be safe in case anything happens (hello, London’s weather”> I normally carry a TSA approved 100 mL container filled with a conditioner that can also serve me as co-wash, conditioner and leave-in. My top one is the Elucence Balancing Conditioner: It is light enough to be used as a co-wash, in cleanses well, but it has also a bunch of hydrating and nourishing properties that make it a great leave-in. As I am a gel girl, in the second 100mL container I have my favorite gel: Ouidad Climate Control. It has a medium hold, and it performs well in almost any weather condition.Keep in mind that I have long hair and a medium density. If you have thicker or longer hair, double up the amount and take 2 containers of conditioner.
Bobby pins and hair ties (the phone cord hair ties”> are a must in case you need to handle a hair emergency and on the go. Could you be fancier and take more? Of course, but I prefer to leave room in my bag to bring back all the nice stuffs I buy!
The One To Two Week Vacation
Since 2 weeks is a pretty long time not to wash your curls, you will probably wash them more than once. In this case, one 100 mL container of conditioner is not enough. Bringing a full bottle of shampoo and conditioner is also not a good plan, since it takes a lot of space and normally you won’t use it all.
For the long vacation, you also have to consider if you are going on a beach vacation or a city trip. You will need more products if you are in and out of the water all day long! For a beach trip, I normally take 3 bottles full of conditioner (100mL each”> that I use as co-wash and leave in. I like to take a gel-cream or a cream as a styler with me because I need less of it to style my hair! 2 containers of 100mL are good enough to keep my hair in place.If you want to travel with a carry on, and you have a lot of hair, solid shampoos (like the Lush or Bobeam bar“> are also TSA friendly, mess-free alternatives! I have also seen solid conditioner at Lush, they are definitely worth to try! Another alternative if you don’t mind to play the curly mixologist is to bring a clay (like Rhassoul clay”> that you can eventually mix with water to create the perfect gentle cleanser. It’s not a liquid so you can bring how much you want!
If you check in your bag
In this case, you can take with you a whole bottle of conditioner to use as co-wash, leave-in, and deep treatment. For styling, I normally go with a good gel that I can count on. Beside the Ouidad Climate Control the DevaCurl Arc Angel is an old trusted friend.
Depending on where you are going, consider trying local products, so that you don’t have to bring too much. A good silicone-free gel is really easy to find in almost every country.
Garnier Fructisse is a brand you can find almost everywhere and they have a lot of silicone-free conditioners to use as styling and co-wash. If you can, another good tip is to put your hair in a protective style, so that it can last you a lot: a twist-out is the best for traveling, since you can keep your hair twisted during the journey and take them down at your destination–you can easily retwist at night with some hair cream for a long lasting style. A Curlformers set for wavy hair is also a good option, since you can rock it for a week with the use of a dry shampoo (Batiste is my favorite”>. Wrap at night to keep it stretched.Enjoy your sweet escape and don’t stress too much about how your hair looks: the joy of a vacation will make you shine like a star even with a frizzy hairstyle!
[prodmod]Anti-frizz shine serums, smoothing pomades–we all are aware of them, we all have tried them. And most of the time they can save us. But what about those times when you do not have your entire proved and tested arsenal of products with you to tame the frizz beast on your head? These 7 frizzy hair hacks will save your hair and day when your home stash is out reach. They have been tested and recommended by yours, truly!
1. Lint Dryer Sheets
A couple of weeks ago in a local beauty supply store I stumbled into a new and “revolutionary” product that should be a day and life saver in case your hair decides to misbehave, which is something my hair likes to do on a daily basis. However, it turned my canopy–the outer layer of your hair–into a field of frizzy, scattered strands. I was already excited for this new discovery when I flipped the package, looked at the ingredients, and saw that the 50$ product was a package of none other than …lint dryer sheets!
Of course, the package was cute and stylish. But that was the only difference. At home, I double-checked the ingredients of my natural lint dryer sheets and they pretty much matched. Why spend 50$ on a fancy product when you can use 4$ lint dryer sheets? Be sure that they are from a natural brand, you don’t want to use overly perfumed and synthetic stuff on your tresses.
How do they work?
The sheets are normally contain cationic surfactants: The same as you can find in your favorite leave in or conditioner (think about Cetrimonium Chloride”>. The positive charged head of these surfactants has an electrostatic attraction to the negative charged surface of the hair: The hydrophobic chain of the surfactant can adhere flat to the hair cortex, forming a film that reduce frizz, static, and smoothes the strands. Again, be sure to use an organic and natural brand because most of the non organic household items are fully packed with nasty chemicals. Yeek!
2. Lipstick or Lip balm
I have probably the worst hairline ever: I have a tons of little curly baby fine hair that NEVER lies flat. Never. It drives me crazy, especially when I forget to put some edge taming gel on it. If that is the case, I luckily always carry a lip balm with me. I tend to use almost only natural products, and the positive thing about it is that organic lip balm are normally made with waxes and oils as a base. They are normally pretty good at glueing down my edges if I can’t use my normal products.
How to apply it
Take a little bit of lip balm with your fingertips and smooth down the baby hair. It works on fine hair, so I can’t promise it will work if you have coarser hair, but give it a try! Another great hack that we use at shootings and runway is to use the infallible 8 hours cream by Elizabeth Arden. It works for smoothing down flyaways and frizz. I tend to prefer the lip balm than lipstick because the 8 hour creams are full of mineral oil.
3. Vinegar Rinse
No more conditioner? No worries. It seems impossible, because we all are products junkies. But once, it actually happened to me! I go through conditioner faster than shampoo, but for a strange reason I always buy them together and in the same amount. If you can’t rely on your conditioner to tame your frizzy hair, use a mixture of water and vinegar to rinse your hair after shampoo.
What does it do?
It will bring the pH of your hair cortex down and close the cuticles of the hair shaft that will give you shiny, frizz-free hair. I normally use 1 part of vinegar to 4 parts of water and apply it right after my shampoo. It won’t help with detangling… so do that before the shower if you can!4. Natural Hairspray
I never use hairspray, but sometimes I really need it to keep a style in place. My weapon of choice is to use a mixture of orange juice and water. It is enough sticky to keep your style in place, and it will also hydrate your hair. It smells good, too. I mix 1 part of freshly pressed orange juice to 5 parts of water. If you have glycerin around, add a tablespoon of it. Shake well and pour into a spray bottle.
5. Honey and Lemon In Shampoo
I often use a mixture of honey and lemon to naturally lighten my hair, especially after noticing my hair was becoming extremely softer, frizz-free and shinier. I experimented putting a couple of tablespoons of lemon and honey in the shampoo to see what happened–magic! My Shea Moisture Superfruit Complex shampoo became even better than before.
How does it work?
If I want a completely safe wash day experience, I always mix a bit of honey and some lemon juice into my shampoo. Since they are fresh ingredients you have to pour some shampoo in a little container and mix it right before stepping into the shower. I am too lazy to do it everyday but when I do it, my hair is always in his best state!
6. Hand Lotion
During the day my hair normally swells up and becomes bigger and bigger. It is normal, especially while living in a cold, humid climate. If you also have this problem, the next time you are using hand cream run your hands over the canopy of your hair while the cream is still not fully absorbed into your skin. It will be like putting leave in conditioner on it! For this trick I suggest to use an organic silicone-free hand cream. Even better if not heavily scented with synthetic fragrance.
7. Toothbrush and Orange Juice
Not only can you create your own natural homemade hairspray from oranges, you can also use pure orange juice on a toothbrush to smooth down baby fine hair or precisely smooth down flyways. It will dry sticking down your frizz for a polished look.
Have you tried any of these frizz hacks? Do you have any not on this list that you can share with the #NaturallyCurly community? Let us know!
The stylist colors the client’s hair according to their facial structure–meant to give dimension and accentuate or hide some traits.Hair contouring is in fact a fascinating technique: According to the Artistic Director of Hairroin Salon in New York, Luis Payne, “Hair contouring is a technique used to sculpt the head and hair shape of the desired look. The “sculpting” is done with hair color as opposed to brushes and makeup.”
What is hair contouring?
The stylist colors the client’s hair according to their facial structure–meant to give dimension and accentuate or hide some traits. Every technique can be used to create the results, from foils highlights to balayage ombré; the main difference is where to place the color. Basically all is in the eyes and hand of the stylist– it is a difficult technique that has yet to be mastered by all stylists. We would not recommend doing a DIY hair contour unless you are a pro at coloring!Unlike some hair coloring techniques, hair contouring works on every hair type, but on textured hair we believe the result will be even better because as we know curly hair can hide a lot . For example, if you think about the ombré style, it looks far better on curly or wavy hair than on straight hair because with textured hair you never see a demarcation line…hooray for our amazing hair!
Your perfect color placement, according to your face shape
Oval
Your face shape is considered the perfect face shape, and every color, cut and style actually looks gorgeous on you, according to hairstylists. Think about adding some lowlights to add movement to the hair!
Square
You have a squared and strong jawline and a wide forehead; you want to soften your features. In the same way that with makeup you would darken your edges, try to keep the hair roots darker than your overall color, that should be on the light side with some soft balayage highlights. For you, the golden rule is “soft and delicate.”
Round
You want to elongate the face and give more shape to your features. The best way is to keep the hair around the face a bit darker than the rest of the hair, lightening the ends to draw the attention in a vertical line. For you, the golden rule is “structure and strong contrasts.”Long
You face is longer than wide. Your goal is to create a horizontal line to draw the attention away from the vertical plane. You are the best candidate for the Ombré look! Having dark roots and lighter ends will create a horizontal division that will make your face appear shorter! Your golden rule is “horizontal lines.”
Heart
You have a cute pointy chin and a wide forehead. You goal is to minimize the wide forehead and accentuate the chin region, so you need to darken the top of the hair and go lighter around the chin and jawline. Opposite to the long face shape, you need softer transitions, like a balayage ombré effect. Your golden rule is “soft gradient.”
Will you be considering hair contouring at your next hair appointment?
From curly hair to Hollywood Waves with no damage and no heat? Yes, it’s possible!
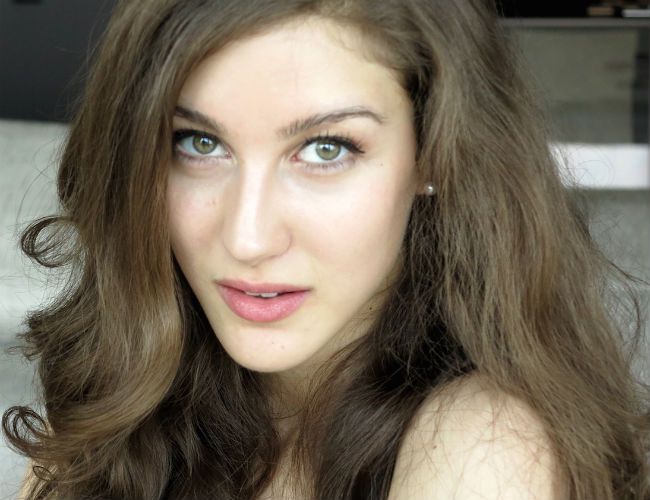
I have been using this routine for a year now, and I always get amazing results. It allows me to wear my hair without having to restyle it in the morning, and I usually get a whole week from this set. It is a nice and glamorous change, with no hot tool needed. This routine works on literally every texture: it stretches the curls in a new shape (temporary!”>. It is great to diminish tangles and to get more days out of a hairstyle, or just a special occasion. Do you!Tools needed
Curlformers or GVP (general value product”> curlformers (I got the GVP because at the time Curlformers did not have the extra wide and extra long I needed for my 20″ hair. I totally fell in love with them (Naptural85 also shares this opinion on her channel”>.
- some clips
- brush (I use the Tangle Teezer“>
- microfiber towel
- optional for the indirect heat option: a hooded dryer or a hood attachment and a dryer.
My favorite styling product combos
- Living Proof Prime & Living Proof Restore Lotion
- SheaMoisture Jamaican Black Castor Oil Styling Lotion (a tiny amount!”>/ Ouidad Mongongo Oil
- Mixed Chicks Straightening Serum
- Design Essentials Mousse
First of all, wash and detangle your hair. I also normally do a deep conditioning treatment, with or without hateful steamer. I prefer using a sulfate free shampoo instead of a co-wash because I like to have super clean hair when I do this set. It gives you more volume and shine.
Wrap your hair in a microfiber towel to take out the excess water. The curlier and the frizzier the hair, the more you want your hair to be wet. So if you have no frizz problem, let them dry till 60%. If you have really frizzy or coily hair, just slightly remove the excess water.
Part your hair down the middle in the back, but create already the side part on top, in the way you want it to be. Clip one side away for the moment. Brush again with the Tangle Teezer to eliminate all the knots and to smooth the hair. The smoother is the hair, the better will be the set.
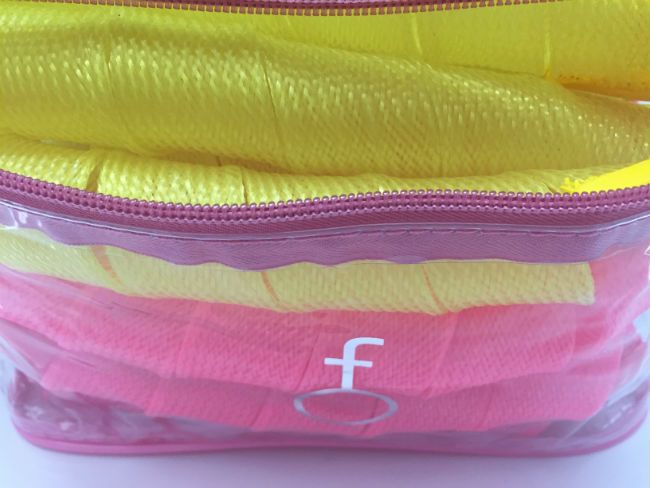
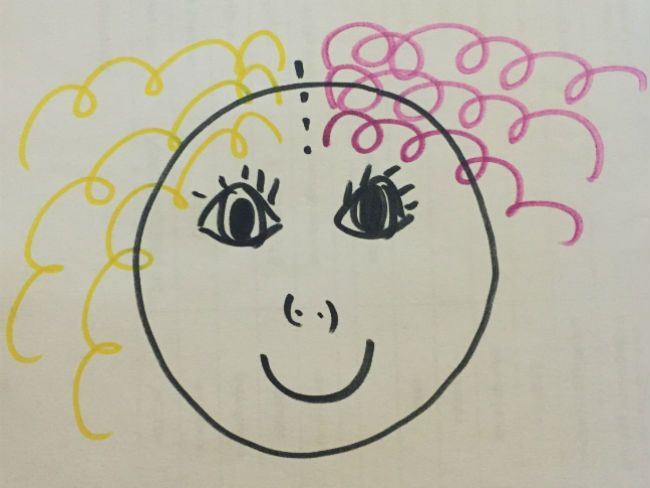
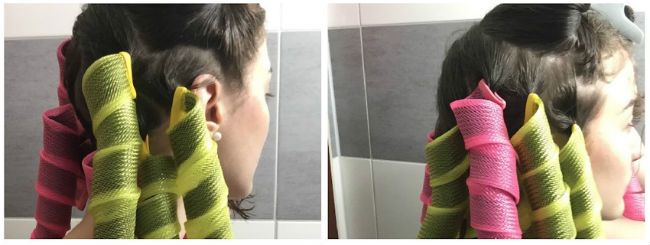
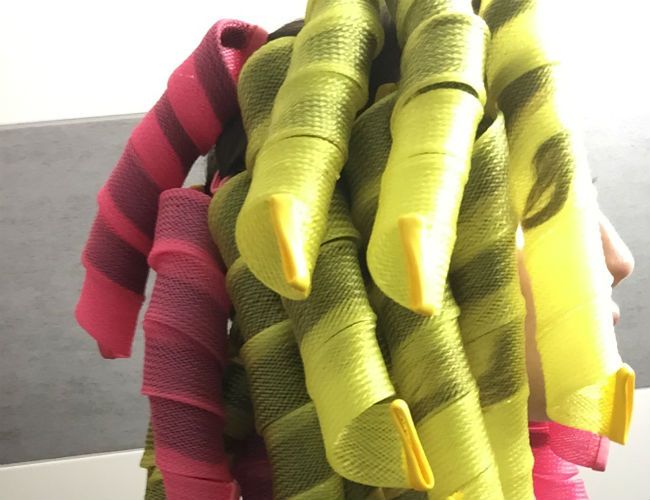
Golden rule: place the curlformers curling away from your face. In my case, my yellow Curlformers turn right, so they go on my right side, the pink Curlformers turn left, so they go to my left side. Yellow right, pink left.
Placement
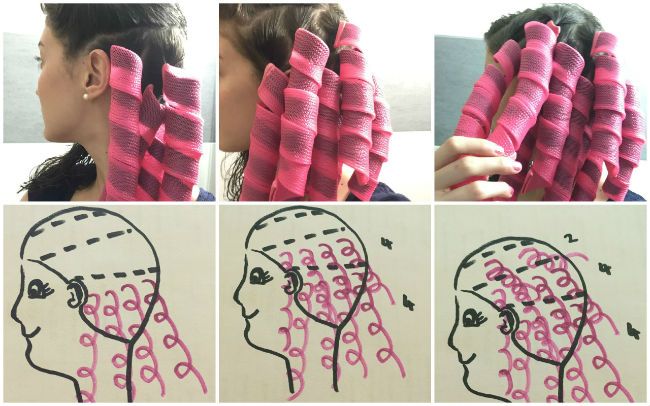
I use 24 curlformers, 12 pink and 12 yellow. This is how I place mine, because I do a side part on the left side. I need more of the yellow curlformers on the right side. If you also do a side part, remember to compensate on the other side with the same amount of curlformers.
If you do a center part, just place all the pink to one side, and all the yellow to the other side.I use 2 more yellow Curlformers in the right side, so I need to compensate and use 2 less on the pink (left”> side. I simply use the 2 pink at the back of my head in my right side.
On the Left side I do 3 sections with 4 curlformers at the bottom, 4 in the middle section, and 2 in the top section. 442=10
On the Right side I use the 2 pink Curlformers with the other yellow Curlformers. I place 4 on the bottom, then 3, then 4, and again 4 in the top section. 4343=14
This is the placement that gives me the best results. You can play around with it, depending on your hair thickness and density. I have fine hair and medium density. With 28 Curlformers you should be able to cover a head of hair with medium density, doing 7 sections of 4 curlformers each.
Application
- Twist the hair away from your face a couple of times. This will help you insert all the hair in the curlformers hook. Drag also the hair down to smooth the roots.
- Insert the hook from behind making sure all the hair is in it.
- Place your thumb over the hub and push the hair up. Doing this will prevent the hair from escaping the hook.
- Cover the opening of the hook with the Curlformer so that the hair won’t escape while pulling the hook down and out.
- Gently pull the hook down.
Now you can air dry or use some indirect heat to speed up the process.
Watch my full tutorial
Take down
- Remove the curlformers simply pushing the rubberized part on the top and sliding the Curlformer down. It helps if you stretch it out.
- You have two options: rocking the tight ringlet curls look, or fluffing them into glamorous waves. If you wanna keep it curly, just divide the individual curls until you are happy with the result. A little oil or serum will calm the frizz. To rock the glamorous waves you just need to brush out the curls gently with a wide tooth comb (I know it seems scary but trust me on this”> and then stretch the pattern. To do so you can wrap your hair around your head (Learn to do it my No Heat video“> put it in a bun for half an hour.
Use some hair serum to tame flyaways… and you are gorgeously done!
We all know that practicing yoga has many benefits for both the body and mind. Regularly practicing yoga improves our mood, concentration, mind-body awareness, overall strength and flexibility. It is also known for lowering the blood pressure and is used widely in medicine as a complementary care to support patient recovery and improve the QoF in chronic illnesses. According to a comparative study appeared in 2010 in the The Journal of Alternative and Complementary Medicine, “The effects of yoga and exercise seem to indicate that, in both healthy and diseased populations, yoga may be as effective as or better than exercise at improving a variety of health-related outcome measures, acting via the hypothalamic–pituitary–adrenal axis and the sympathetic nervous system.”
Yoga is also extremely beneficial for a healthy hair grow rate. The more down-facing positions you do, the more blood goes to your scalp and follicles, thus proving for faster hair growth. Note: I personally saw a huge improvement since I added to my workout routine this set of poses. Keep in mind, I am not a professional Yogi. My poses are not perfect. I am working toward it. Don’t judge too harshly!Yoga is also extremely beneficial for a healthy hair grow rate. The more down-facing positions you do, the more blood goes to your scalp and follicles, thus proving for faster hair growth.
Child Pose
This pose relieves stress, and stress leads to a constriction of the blood vessels. It prevents nutrients to enter the follicle. It is a wonderful pose that everyone can do since it doesn’t require impeccable flexibility.Extended Spine
Keep your legs straight, feet parallel, and bend gently forward, keeping a straight spine. If you are not extremely flexible–like me–you probably will not touch the floor. But do not worry, it is important that you don’t curve your spine trying to go lower.
Downward Facing Dog
From the previous pose, bend forward and touch the hands to the mat, keeping your head between your arms. Keep the spine flat and try to push your heels to the floor. You will feel your blood warming your scalp. This will also give you a great overall stretch.
Downward Facing Dog On Elbows
If you want to go deeper, bend your elbows. Keep the head between your arms, the spine flat and push the heels towards the mat. Breathe.
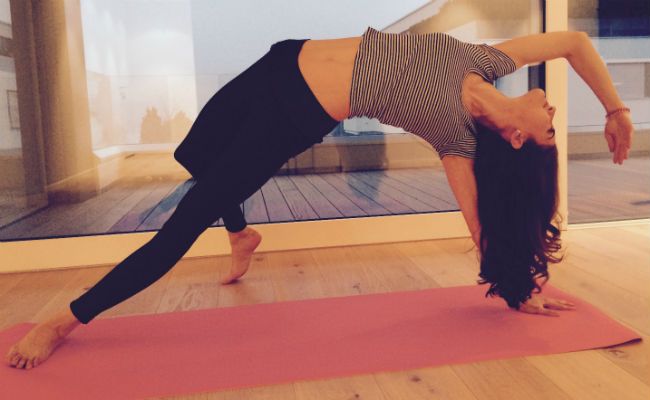
Flip
I love this pose because it is so graceful and powerful at the same time. From the Downward Facing Dog push into a plank, than a side plank, then just flip on one side using one foot as anchor and the other to stabilize you. Take a moment to appreciate how elegant you look!
Triangle
You are in a standing position, legs are wide open, feet facing forward. Now, turn the right feet to the front, imagining a line intersecting the left feet. Bend your hips to the right side; try to touch the floor with your right hand, and the sky with your left. Feel the stretch and relax.
Bound Extended Side Angle
From the triangle pose, bend the front leg and interlock your hands behind the back, with the right one passing through your legs to reach the left one. It’s an advanced pose that you can bend your head, making it even more beneficial for the hair.
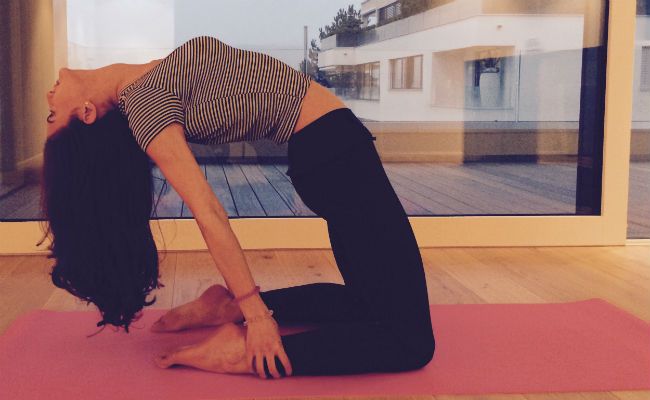
Camel Pose
This pose can hurt your back, so skip it if you are not really flexible or if you just started. On your knees, simply and slowly bend back, grabbing your ankles with your hands. This pose is great if you are sitting in front of the computer all day, because it will open up your chest.
Bonus Pose: The Fall
If you fall down, do not give up. Everyone has a starting point. I encourage you to try these poses at least three times per week and you will see an improvement in your hair growth and health, along with increased flexibility and a bunch of other benefits. (For everyone wondering, my hair is in a Curlformers set. Looks pretty awesome, doesn’t it?”>
Important note
I want you to be aware that every pose that puts stress on the cervical and lumbar spine, such as headstands, backbending positions, it’s extremely dangerous, especially for beginners. Being a surgical resident, I wanted to throw in this important information. Also, If you have recently suffered from a stroke, glaucoma, you had eye or brain surgery or, to put it simply, you suffer from some kind of disease of the head, do not do any pose that could lead to an increase amount of blood (pressure”> in the head and brain. If you are not healthy or you suffer from a disease, check with your GP before starting any new exercise routine. Make every move responsibly and do not push yourself over your personal limit.
If you engage in these exercises, you are doing so at your own risk and assume all risk of injury to yourself, and agree to release and discharge NaturallyCurly and the author from any and all claims or causes of action.
When NaturallyCurly released their 2014 Best of The Best product winners, I was super excited. Every time it comes out I like to check and see if what I liked throughout the year was a hit for other curly girls too. It is also a good way to discover new products that are “must haves.” But because I live in Europe, I cannot always find all those holy grails on the ground here. I order product several times per year from Curlmart, but there are times when I desperately need a product and I don’t want to wait for it to be delivered.
I have been a Curly Girl since 2009! I have always alternated between local products and USA holy grails, and over the years I’ve discovered several dupes of my favorite brands that are available in Europe.If you are a European curly or if you you are planning a trip overseas, you are lucky–here is my secret list of comparable products that you may want to try–in my opinion, some are actually BETTER than the original!
Generally speaking, the brand Phyto is great for styling products and the brand Lavera for masks, conditioners and shampoos.
The Original is listed first; then, the dupe follows.
They are available at Sephora, Globus and Naturasí.
- Curly Hair Solutions from Curl Keeper – Sanotint, oli non oli
- Kinky Curly, Curling Custard – Phyto, Phyto Défrisante
- Kinky Curly, Knot Today Leave-In – Bio Officina Toscana, Balsamo
- As I Am, Coconut Cowash – Splend’or, Balsamo al Cocco
- DevaCurl, Set It Free – Alchimia Natura, Capelli di Luce Spray
- Shea Moisture, Coconut & Hibiscus Curl & Style Milk – Nivea Styling, Flexible Curls
- Curls Like Us Curl Cloths – Your dad’s t-shirt!
- DevaCurl Light Defining Gel – Leonor Greyl, Gel à l’Hibiscus Alcohol-Free Shaping Styling Gel (better than the original!”>
- DevaCurl Ultra Defining Gel – Phyto, PhytoProfessional Strong Sculpting Gel
- DevaCurl Low Poo – PHYTOSPECIFIC, Curl Hydration Shampoo
- Carol’s Daughter, Monoi Repairing Anti-Breakage Spray – Lavera, Orange Express Leave-In Spray
- Curl Junkie, Curl Rehab Moisturizing Hair Treatment – Lavera, Organic Repair and Care Intense Treatment
- DevaCurl, MirrorCurls – Lavera, Rose Repair & Care Hair Serum
- Carol’s Daughter, Chocolat Smoothing Blow Dry Cream – Phyto, PhytoKeratine Repairing Thermal Protectant Spray
- Briogeo, Repair Don’t Despair – Louise Galvin, Sacred Locks Treatment Masque for Thick and Curly Hair
Remember
All of the products mentioned “should be” silicone-free and CG-approved but as I always say, double check because I recently discovered that several products have a different formulation in every country. For example, my beloved René Furterer Karité Leave In is silicone-free in Europe but contains silicones in the USA. Next time you are shopping around in Europe get those products a chance and have fun discovering new wonders! Note: I have listed comparable products based on the results achieved, not the ingredients.Raise your hand if you have ever done anything damaging to your hair? I am definitely guilty of putting my curls through a lot. I have had it all–coloring, bleach, heat tools, brushing… As a result, I have a special DIY routine to to battle the breakage, dryness and excessive split ends that damage can bring.
I use these recipes as soon as I start to see my hair getting frustrated. I can easily spot my hair edging near the point of no return. Usually I am able to reverse the situation quickly.
If your hair is feeling less defined, lost its bounce or shine, these simple recipes using what you already have at home. No need to buy fancy hair products! In this mask I combine the benefits of avocado, honey, olive oil and egg yolk:
- The Avocado contains emollients that soften and prevent dryness, vitamins B5 and B6 to nourish the hair follicle and improve elasticity and shine, proteins and amino acids to strengthen the shaft and fill in the gaps, making the hair stronger.
- Honey is a wonderful ingredient to use on your hair because it contains vitamins and acts as a humectant (attracts moisture to the hair like glycerin”>, and has also antibacterial properties, making it perfect to soothe an irritated, dry scalp.
- Olive oil is one of my favorite oils because it can actually penetrate deep in the hair shaft, making it a great oil to restore hair elasticity. When your hair loses elasticity, your curls drop and the hair breaks. Nobody wants that. Olive oil is also packed with vitamins and emollients to nourish the hair structure and the skin.
- Egg Yolk (If you are vegan, feel free to skip this ingredient”> is rich in proteins, perfect to strengthen the hair, but also vitamins to prevent hair loss, super nutrient fatty acid to restore softness and shine and protect and maintain the vibrancy of your hair color.
Note: These measurements are for medium-length, medium density hair. For thicker, longer hair, increase the amount to your liking.
The Ultimate Mask
- 1/2 ripe avocado
- 3 tablespoons olive oil
- 4 tablespoons honey
- 1 egg yolk
Mix everything together until smooth, apply on the hair for 30 minutes, keeping the head warm then wash out with cold (important!”> water. If you feel your hair being greasy after this treatment, wash them with a sulfate free shampoo or a cleansing conditioner.
The Oil Elasticizer Pre-Poo
Yes, even washing the hair can be damaging. Wet hair loses proteins and water allows the hair to stretch. To prevent the damage caused by excessive washing, I pre-poo: I coat my hair with coconut oil and olive oil, two great penetrating oils that prevent the loss of elasticity. I leave this mixture in my hair for about 15 minutes before washing and conditioning my hair as usual.
The Strengthening Gel
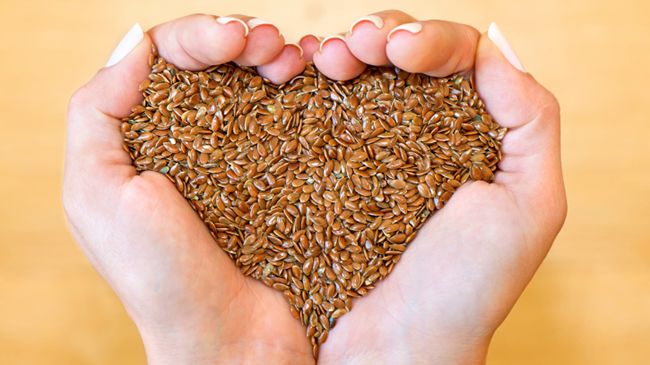
Flaxseed gel is an old time favorite of mine. I have been using it for 7 years, every time I need to give my hair some TLC but I don’t want to compromise my styling. The homemade flaxseed gel gives a light to medium hold (depending on how thick you want it”> and with my added boosters, it is an amazing DIY treatment-styler all in one.
- 4 tablespoons flaxseeds
- water to cover the flaxseeds
- 1 teaspoon coconut flour
- 1 teaspoon of olive oil
I prepare my flaxseed gel as usual, boiling the seeds with the coconut flour and then I separate the gel with a sifter. I usually let it sit for 20 minutes until cold, then I add the olive oil.
- The coconut flour provides the proteins and the olive oil has emollient benefits to keep the hair shiny and elastic. I store it in the fridge in little containers of one dose, so I can use it whenever I want.
Pass these damage-erasing mixologies to all of your curly best friends!
- 1
- 2

